|
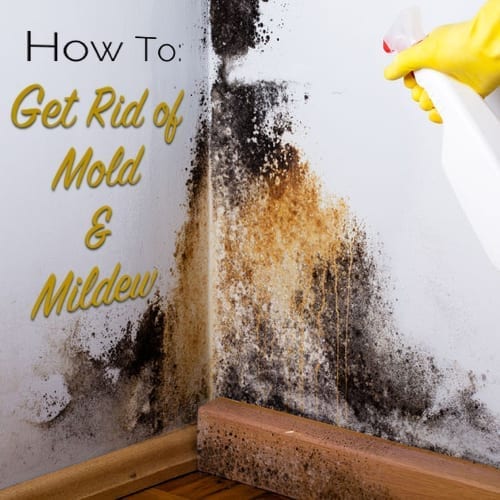
Mold and mildew are not friends to old houses. Whether they show up indoors or out, they need to be eradicated wherever they show up. Determining the difference between mold and mildew is not exactly the easiest task.
In this post, I’ll show you how to figure out what you’re dealing with, how to kill it, and how to make sure it doesn’t come back again. Won’t that be nice? Read on for the details! Mold vs. MildewWhile the names are used almost interchangeably these are two slightly different things. Mold and mildew are both fungi but they present in different ways and create different issues. MoldMold is a fun-guy! No seriously, it’s a form of fungus that can grow about anywhere it finds the right conditions. What are the right conditions?
It needs all four of these conditions to exist before it will grow. Mold spreads by microscopic spores that are floating almost everywhere. They hitch a ride on our clothes and other materials and settle on some flat surface where they wait for the perfect combination of the right conditions listed above. Mold is useful in nature because it breaks down old trees and other material, but not so valuable in our houses because it can make us sick and cause structural damage. Mold appears in a multitude of colors like black, brown, rust, mustard, green, and many more since there are thousands of different kinds of mold. It usually presents itself like a blotchy appearance on surfaces and gradually fills in to cover the entire surface if left unchecked. Mold is a danger and should be resolved immediately if discovered. MildewMildew is basically a type of early stage mold that grows flat on surfaces where there is excess moisture. Mildew appears most often on surfaces like shower walls or window sills where there are high moisture concentrations. It has a dusty or light grey appearance at first but can turn darker if it has time to mature. Just like mold it needs warmth, moisture, oxygen, and a food source to grow. Mildew creates a musty smell just like mold, but it poses very little health risk to humans and very little risk of damage to the surface it is growing on. To me mildew is a more of a cosmetic issue and an inconvenience rather than a problem. How To: Get Rid of Mold & MildewSo, how do you get rid of mold and mildew if you discover it? The treatment for mold and mildew is very much the same except in extreme cases. If you have large areas of toxic mold then it’s best to have a professional handle the clean up. For small areas and preventative purposes follow the instruction I outline below.
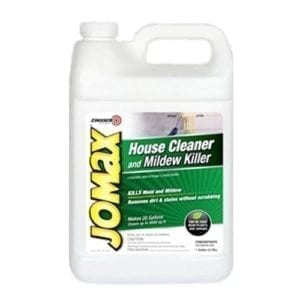
You can go with Jomax or any of the myriad other cleaners or you can go the old-fashioned way which works just as well. Mix your own mold and mildew killer by mixing 3 parts water to 1 part bleach. For really tough areas try the more concentrated mixture of 1 part water to 1 part bleach. Keep in mind that whatever cleaner you use it likely already has some kind of bleach or bleach alternative in it so rugs and other materials can be damaged if they get the chemicals on them. Some areas may be more problematic than others and may require treatment a couple times before the problem is resolved so you’ll have to judge for yourself if one treatment did the job. Another option for larger infestations is to spay the cleaner on the surface and scrub the surface with a firm bristle brush or scrubbing pad and then rinse the surface. No one can avoid mold spores but if you keep your house cleaned regularly inside and out it will definitely aid in preventing mold and mildew growth in the future. The post How To: Get Rid of Mold and Mildew appeared first on The Craftsman Blog. from https://thecraftsmanblog.com/how-to-get-rid-of-mold-and-mildew/
0 Comments
If you follow me on Instagram, you’ll know how much I despise fake shutters. I’ve even done another video all about fake vinyl shutters and avoiding the major design faux pas that they are. But, with the video tutorial below, there should be no reason why you can’t have awesome and functional board and batten shutters on your house. The board and batten design has been around for centuries because of its simplicity and it’s not just for shutters. It can be used in siding, doors, wainscoting, and a slew of other design options once you understand how it works. So, let’s start building! Picking the Right WoodYour board and batten shutters are going on the outside of your house, right? So, you want to choose a wood that is both rot-resistant and holds paint well. I’ve got a whole post on choosing rot-resistant wood here if you want to dive in deeper to the topic, but in this post, I’ll give you some good options. The species of wood you have access to will largely vary depending on your region. Some good options are Cypress in the South, Redwood in the West, and Eastern White Pine in the Northeast, and Western Red Cedar just about anywhere, but you can pick anything you want. A couple options to avoid at all costs would be Poplar and Oak. Poplar takes paint better than almost any wood, but it has terrible rot resistance and will fail quickly. Oak, while it can be fairly rot-resistant, is terrible at accepting paint. If you are doing varnished shutters, then this is a possibility, but I recommend painting your shutters. For my shutters, I am using pre-primed Red Cedar from my local lumberyard. It’s already dimensioned and primed, so that leaves very prep little work for me to turn them into shutters. Measuring for ShuttersShutters are designed to fit within the window well. The same area occupied by your screen or storm windows is where the shutter will be located when it is in the closed position. Measure the height and width of this area in a few places just in case your window is bowed or out of square which could cause your shutters to fit poorly without modifying them first. Say your window is 30″ w X 60″ h, which is a fairly standard size old window. You shutter will need to fit within that opening with a little space on each side, so the overall dimensions you’ll need to fill should be be around 29 1/2″ X 59 1/2″. I like to subtract 1/2″ from each measurement which gives you a 1/4″ gap around the whole window. Remember, in most cases, you’ll need two shutters for each window. Each shutter will be 59 1/2″ high by you’ll need to divide the overall width by 2 which makes each shutter 14 3/4″ X 59 1/2″. Makes sense? Just a little more math and we’re done. For board and batten shutters, you need to figure out the sizes of your boards. In my case, I ended up using two 1×6 boards and one 1×8 in the middle ripped down just a bit to get the right width. Building Board and Batten ShuttersGo ahead and cut all of your boards to length on a miter saw, and then make any rips that you need to accommodate the width of your window. After the boards are cut, you’ll need to cut at least two battens for each shutter. You can use three battens for each shutter too, but two per shutter is most common. Each batten will run diagonally across the boards and should be just shy of the width of your shutter. You have some liberty in how wide and where you place your battens. Once everything is cut, lay it out on a table and double check your measurements and play with the layout of your battens. Once you like your layout, use a 15 ga. nail gun to put two nails through the batten into each board (don’t skip any boards). You can assemble it using other options too, like wood glue, construction adhesive, screws, or even narrow crown staples. It really depends what your preferred method is, as long as it secures the assembly together strong enough. Fill any nail holes, sand it smooth with 120-grit sand paper and then paint it your preferred color. Installing ShuttersThere is so much hardware available for shutters that it difficult to know what to choose. My recommendation is to go to House of Antique Hardware and pick out some hardware you like, then call their customer service department and ask them what size and offset you’ll need. That’s what I ended up doing because it was so confusing. I’ve only repaired shutters and prior to this post had never actually built and installed new ones. The options are endless, so let them help you find the right stuff. I went with 10″ offset strap hinges for my shutters and a simple hook and eye latch with shutter dogs. The strap hinges are simple to install with just 3 screws. I centered them on each of my battens and screwed them easily. Once the straps are on, you have to install the lintel part of the hinge to the trim on the building. This lintel is not hard at all, simply take the shutter and place it where you would like it to rest when closed in the window opening. I used a couple shims to keep it off of the sill during installation. With the shutter in place, insert the lintel into place and set one screw to hold it in place. Then remove the shutter and set the remaining two screws. Repeat that for the top lintel and then set your shutter in place on the lintels to check the operation. Should be smooth as butter! Repeat these steps for the other side. Now, for the shutter dogs. Open your board and batten shutters all the way and locate the shutter dog below the shutter so that it will prevent the shutter from closing when in the vertical position. Install the screws that hold it into place. On stucco buildings, it is usually a leg bolt used for installation rather than a few wood screws. When you want the shutter to open, you turn the shutter dog horizontal, which allows the shutter to swing past it. Then, close your shutters and attach the hook and eye on either the inside of outside of the shutter, whichever you prefer. Why Shutters?Why not? Shutters are incredible! They can protect your windows from storms. They can be closed to keep the sun out and keep a room cooler in the summer or warmer in the winter. They look very attractive when done properly. They are overall an awesome addition to an old house. There are some houses that call for shutters, but I will tell you that though you can put them on any house, not every house style was build with shutters in mind. Some like Colonial Revival, Georgian & Adams, Greek Revival cry out for shutters, but styles like American Craftsman and Mission Style don’t generally belong in the shutter family. Now that you know the awesomeness of shutters, go build something great! The post How To: Make Board and Batten Shutters appeared first on The Craftsman Blog. from https://thecraftsmanblog.com/how-to-make-board-and-batten-shutters/ 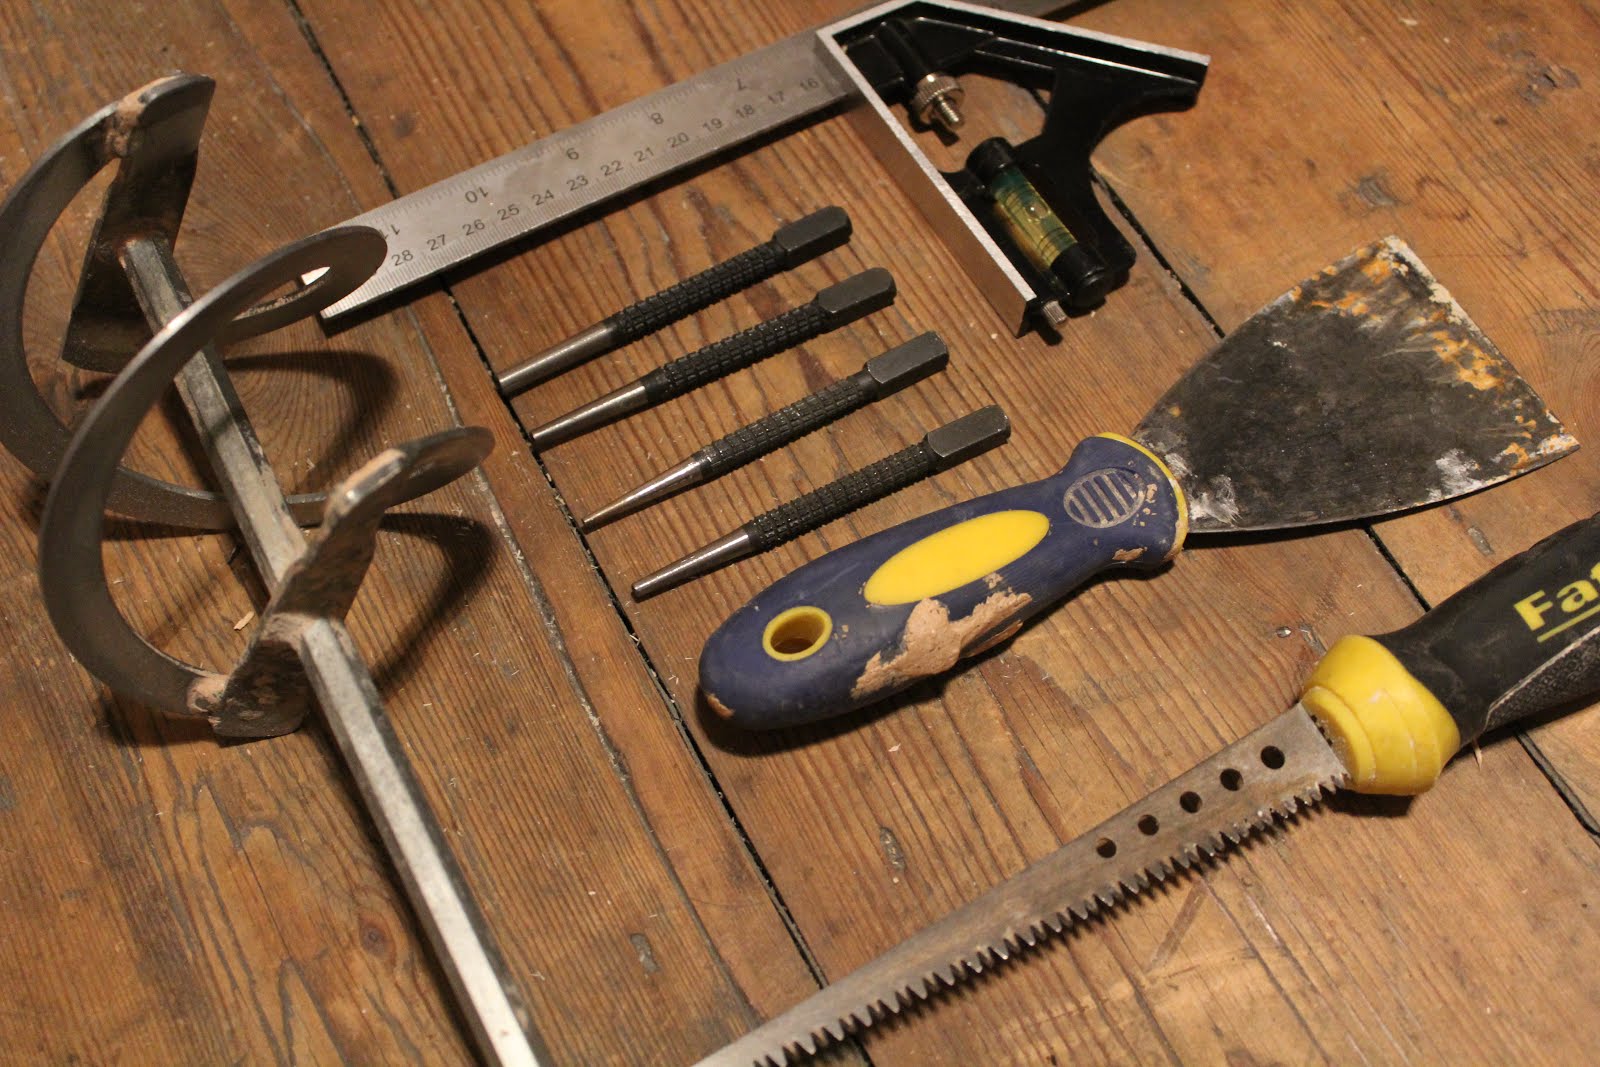
Having now owned a rather extensive DIY supply kit, I thought it was about time I shared some of our favourite tools (and not-so-favourite tools - coming soon...) that we think every toolkit needs.
This list was really hard to narrow down if I'm honest and we've tried not to choose tools that are too task specific. These are all tools that we use relatively often and genuinely find useful. I haven't bothered with stuff like screwdrivers and hammers, 'cos lets face it - if you don't have the bare basics, you probably don't have any interest in DIY and you most likely aren't even going to be on this site.
So, let's get to it!
Read more »from http://www.kezzabeth.co.uk/2018/11/5-diy-tools-under-5-worth-buying.html 
For the last four years, we've had one small storage issue - where should the bikes live? For a while, they lived in the hallway, then in the bedroom and then they just hung out in the garden like a lost sock. Not only was it cluttering up my otherwise (semi-)organised garden, it wasn't so great in the winter, as the bikes would be wet, covered in snow and generally make them prone to quicker wear and tear. Grant uses his bike almost daily, so we needed them to live somewhere accessible, but somewhere they could stay out of sight and dry too.
So, of course, I had a plan - a bike shed. BUT a bike shed with a difference. A combined log store bike shed! Typical bike sheds are usually quite short in height and I felt not making use of the space above would be a waste. So my plan was to have a bike shed at the bottom and then use the area above as log storage. The problem was, no one sold anything that suited my brief - so I decided to make one. And of course, I'm sharing the full DIY with you. Read more »from http://www.kezzabeth.co.uk/2018/11/diy-how-to-build-a-bike-shed-log-store.html Trying to choose what sheen paint you should use on your project may not have been something you’ve given much thought to, but it can make a huge difference in how the final product looks. Not only are there a bunch of different sheens to choose from, but every paint company has a different name for their sheen levels. So, what do you choose and why so many sheens?
Not only do you want to learn how to paint a room properly, but choosing the right paint sheen is just as important as technique. Flat/Matte PaintFlat paint is the perfect way to hide rough walls or textures that you don’t like. It helps the wall have a uniform appearance and doesn’t highlight surface imperfections at all. Flat paint belongs in only low traffic areas where there won’t be a lot of hands touching it. Stay away from using flat paint on railings, doors, windows, and the like because they all get lots of hand traffic. The reason it doesn’t work well with traffic is that is doesn’t have as strong of a grip and can often be scraped off very easily, as well as the fact that cleaning is not really an option. Any paint other than flat can usually be cleaned with a damp cloth to get dirt, crayon, pen, or scuffs off. Not flat paint. Cleaning with a damp cloth mostly smears the offending mark making more of a mess. Flat paint excels when used on ceilings and rough textured walls as long as it is not used in damp or high traffic rooms like in bathrooms or kitchens. EggshellThe next step up on the paint sheen ladder is eggshell. Aptly named because it is about the same sheen as an eggshell (clever, huh?). Eggshell is a good all around paint for walls where it is probably the most popular paint sheen. It still hides like flat paint (though a little less) and has decent clean-ability. If your walls aren’t in rough shape, then an eggshell paint sheen won’t make you cringe at the flaws it reveals. It’s not glossy enough for use on doors, windows, or trim, so keep it on walls only for the best results. Satin/Low-LusterSatin paint is a good all around paint and it can honestly work just about anywhere you want. Satin is best reserved for walls in bathrooms and kitchens because of its very good clean-ability. The high moisture levels in bathrooms can wreak havoc on flat paints and so the minimum I recommend in these rooms is satin. Satin is also sometimes used on trim, windows, and doors. This is the bare minimum level of sheen I would recommend for these high traffic elements. It is cleanable enough and gives an attractive appearance, especially if you have rough surfaces on your woodwork. Satin will help hide trim imperfections compared to its higher gloss cousins below. Semi-GlossSemi-gloss is a great all around paint for trim, windows, and doors. It is very cleanable and holds up to heavy traffic over years of use. The reason for its popularity is that it gives that high performance look of high gloss paint without showing every single solitary flaw. It’s relatively easy to apply compared to high gloss paint too, allowing it to hide brush marks better. Check out the video at the end of the post for some tips on avoiding brush marks! Places that semi-gloss paint absolutely does not belong are ceilings and walls. Even the best drywaller or plasterer will leave marks on their work that would normally not be an issue when painted with eggshell or flat paint, but when you apply semi-gloss paint to a large flat surface, you will see every flaw distinctly. In addition, it causes issues with light reflection on walls due to its higher sheen, creating all kinds of ugly shadow lines. Don’t do it. High-GlossFor the greatest impact, nothing beats a high-gloss finish. It shines like the sun and is extremely durable, but requires exceptional skill to apply properly. High-gloss paint is not forgiving of surface imperfections and shows every single brush mark like a secret posted on Facebook. There is no escaping the flaws that high-gloss shows. But, when applied well to things like a front door, high-gloss paint is a beauty to behold. And there are really only two places I recommend it. Exterior doors and cabinets. It takes extensive prep and often a spray-on application to get it just right, but if you have the guts, then go for it because it is something special. Final ThoughtsI hope this helps you discover what sheen paint you should use and where. One other little tip about paint sheens is that paint prices usually go up about a dollar a gallon for each increase in sheen. So, you can save a little money by only using the higher sheen paints when you need them. Good luck and now go paint something! The post What Sheen Paint Should I Use? appeared first on The Craftsman Blog. from https://thecraftsmanblog.com/what-sheen-paint-should-i-use/
There are so many parts of our home that are finished, but unfinished. Like the random piece of skirting board in the kitchen that hasn't been attached, the door that's lived without a handle for two years, the bits of filler on the walls I never sanded and repainted, oh and the two semi-attached bulbs hanging precariously from the dining room ceiling. You know it goes - nothing is ever 100% complete.
Over the next few weeks though, we're on a mission to fix all these little niggly things and one of those jobs involved buying/creating two light fittings for the dining room ceiling. With a budget of £0, we decided to get creative rather than buy something - and this is what we came up with...
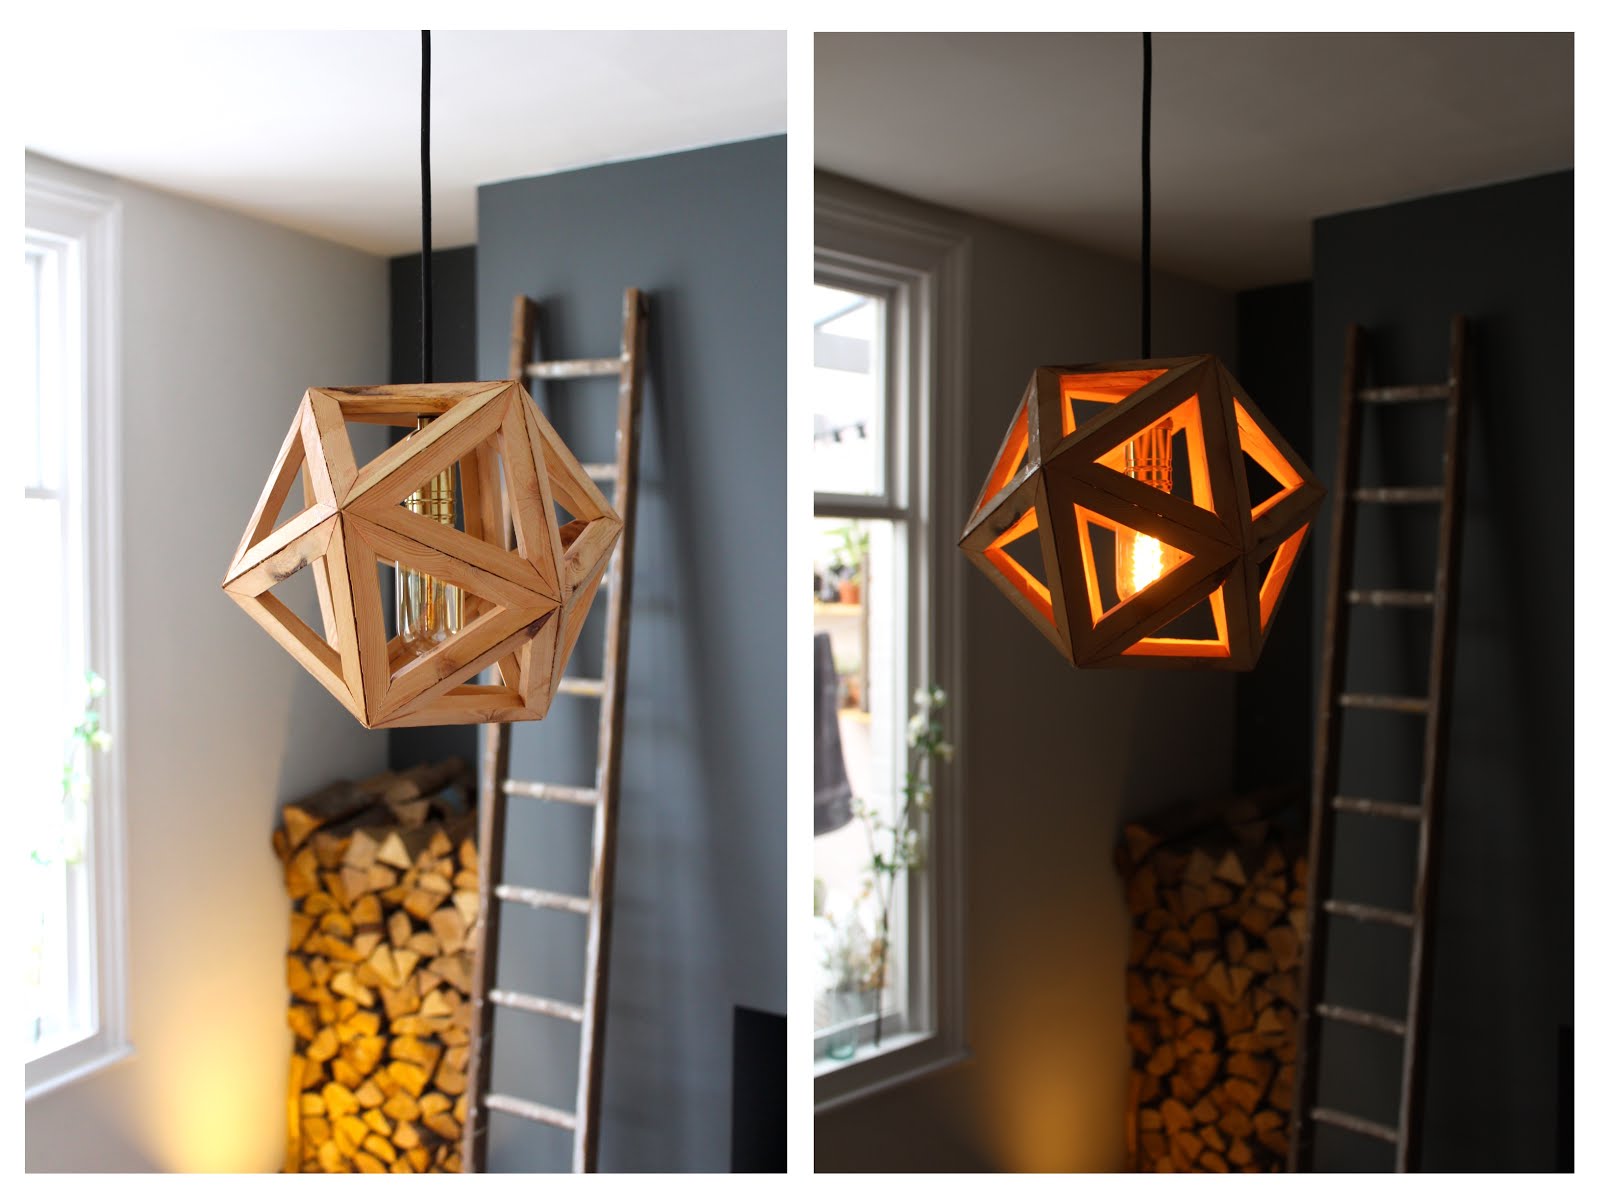
from http://www.kezzabeth.co.uk/2018/10/diy-geometric-ceiling-light-icosahedron.html
When you stack up wood glue vs polyurethane glue, you find two very versatile and powerful glues that should get you through just about any project you could need. They both have their strengths and weaknesses, and knowing how to use them and when to use them will make you a better carpenter or DIYer. Keep reading and I’ll lay out the advantages and disadvantages of each so that you can figure out what will work for you. Wood GlueWood glue, sometimes known as yellow glue, has been around for a long time and is a workhorse of the carpentry shop. It is very easy to use and bonds so well to wood that the wood around the glue usually fails before the glue joint does when stressed. It is simple to apply and requires very little skill to apply with success. Advantages of Wood Glue
Disadvantages of Wood Glue
Wood Glue is for exactly what is sounds like. Wood. If you are laminating wood pieces together for projects like butcher block counters, cutting boards, or simply trying to make a larger piece of wood then wood glue is the way to go. For bonding wood along its sides or faces, wood glue provides the strongest bond on the market and is easy to apply. Wood glue works best when applied to both pieces of wood and brushed to cover the entire surface. Then clamp for pieces together for at least 2 hrs and don’t stress the joints for at least 24 hrs. Make sure you find the right kind of wood glue that fits your needs since there are a lot of manufacturers with a lot of different products out there. My preference is Titebond and I’ve written a post comparing their three types Titebond I, Titebond II and Titebond III and when to use each. If you decide that wood glue is right for you, then check out that post. Polyurethane GluePolyurethane glue, often referred to as Gorilla Glue because they were the first company to bring it to the US, is one of the most versatile glues around. Unlike wood glue, polyurethane glue can be used effectively on a variety of substrates like wood, stone, metal, ceramic, foam, glass, concrete, and lots more. There are very few materials you can’t glue back together with polyurethane glue. Advantages of Polyurethane Glue
Disadvantages of Polyurethane Glue
One of the tricks of polyurethane glue is how it cures. It requires moisture to cure rather than air drying like wood glue. That means that you’ll need to mist both surfaces lightly before applying the glue for a good bond. Unlike wood glue, polyurethane glue excels at connecting end grain joints, so keep that mind as well. You may also have noticed that I listed “expands to fill joints” as both an advantage and disadvantage. That’s not a mistake. That expansion makes polyurethane glue an excellent choice for uneven, irregular surfaces. It also poses a challenge when gluing two smooth surfaces together because if not clamped properly, that expansion can push the surfaces away from each other. Comparing wood glue vs polyurethane glue, you have a working time about half that of wood glue with polyurethane. For little projects this might be helpful, but for larger glue-ups, this usually causes problems. Which Glue is Best?The answer is neither, or rather…both! They are different glues with different strengths and weaknesses like I said earlier, and in my shop, I have need of both. Just like your tools, your hammer isn’t better than your screwdriver, they just do different things. And while they may both be glues, they are worlds apart in how I use them. For the random things that break around the office and any end grain carpentry projects, polyurethane is my go to glue. When I’m laminating lumber, gluing dutchmans in place, or any other woodworking other than end grain connections, wood glue is the right choice for me. I recommend you have them both in your shop. Buy a big container of wood glue and a smaller one of polyurethane to avoid it expiring and then use them for the jobs they were intended for and you’ll be a better craftsman for it! The post Wood Glue vs Polyurethane Glue appeared first on The Craftsman Blog. from https://thecraftsmanblog.com/wood-glue-vs-polyurethane-glue/
So, how did I come up with those numbers? Here’s my simple math: I’m figuring the winter heating season runs from November through March so that’s five months of high energy bills that for most people I talk to average around $300 a month. I’m sure some of you pay way less or way more depending on the condition of your house and weather you live in the Carolinas or the Dakotas. If you could save 20% on your heating bills, that would be about $60 per month for five months, which gets you to $300 this year. 20% savings on a house should be an easy number to meet (and even beat) if you do all four of these hacks. So, let’s get into the details and start saving money! 1. Add Storm WindowsIf you have your original historic windows and you don’t have storm windows, you’ve got to consider adding them before winter. Storm windows not only protect your windows from the winter weather, but they make them extremely energy efficient! A single-paned window in good shape with an exterior storm installed can actually exceed the efficiency of a double-paned replacement window! Read the facts here. Buying a whole house full of storm windows can be expensive, believe me, I understand. But if you’re handy, you can save a ton and make your own DIY storm window. Think it’s too complicated? I created a video and a blog post to show you exactly how I do it. It’s not tough at all and you don’t need big woodworking tools, just some basic stuff. Check out the video below. 2. Seasonal WeatherstrippingWhat kind of weatherstripping you choose totally depends on your budget and situation, but there are a lot of options out there. The long and short of it is that you need to keep that cold air out and that warm air in. Leaky doors, windows, attics, leaky anything is no good for winter, so get them sealed up now. Seasonal weatherstripping options are very inexpensive, because they are something simple you apply in the fall and remove in the spring. The video below will give you ideas on some of the products you can use and how to install them. 3. Add InsulationNow that your attic isn’t blazing hot, it’s the perfect time to go up there and add some blown-in insulation. Blown-in insulation is one of the simplest types of insulation to install and almost any DIYer can install it. It works for most houses with an open attic space due to its great versatility and is almost impossible to screw up. Pick up a few bags of my favorite Green Fiber, or try recycled denim and most big box stores will even loan you a free blower to install it when you buy from them! Check out this detailed post on the process for all the tips you need. 4. Spring Bronze Weatherstripping
Check out this series of posts about installing spring bronze on doors and windows for tips:
What’s It Worth?Yes, there is a cost to these improvements, but they continue to pay for themselves all winter and some of them will continue to pay for themselves year after year. Just think that in 4 years, we’re now talking about thousands of dollars in savings. Making little energy improvements to your old house piece by piece can be immensely satisfying to not only your wallet, but your comfort. Avoid those drafts and high energy bills this winter with just a little pre-planning this year and get to work now to slash energy bills before it’s too late. The post 4 Hacks to Slash Energy Bills by $300 This Winter appeared first on The Craftsman Blog. from https://thecraftsmanblog.com/4-hacks-to-slash-energy-bills-by-300-this-winter/
We all want to avoid rot, right? Does anyone here appreciate termites and powder post beetles? I thought I might know the answers to those questions, but the bigger question is this: “Is there an attractive alternative to the ugly green PT lumber we’ve all be relegated to using the last half century?” Sure, you can use old growth lumber when you can find it and deal with the nail holes. I love the character of old wood, but I don’t want to waste it on paint grade outdoor projects that don’t call for heritage quality woods. You’ve also got the option to use exotics like Mahogany, Spanish Cedar, and Sapelle to name a few, but those aren’t consistently available in my experience and are rarely sustainably grown (I don’t like cutting down rain forests FYI). That leaves us with standard PT lumber, right? That works well for decks and rough stuff but when I am building doors, windows, exterior trim, or anything else that needs a more refined look, I’m left with very few wood options. Last week I talked about cement board options like Hardie Trim, but sometimes you need wood and I want to have a wood option that won’t rot away in a few years! What is Accoya?Accoya is the next generation of treated lumber that is non-toxic, sustainably grown, dimensionally stable, and extremely resistant to rot and insect damage. Check out the video below for a quick explanation of Accoya. Accoya is FSC certified sustainably grown Radiata Pine that undergoes a special treatment process called acetylation. For the science nerds, here’s what happens: The chemical structure of wood typically contains hydroxyl groups, which encourage the uptake of water (trees need water to grow right?). During the acetylation process, those hydroxyl groups are changed to acetyl groups. This new cell structure of the wood results in a wood that absorbs 80% less water, is no longer recognized by mold and fungus as food, and is indigestible by insects. Those are three major scores!! The acetylation process uses an industrial vinegar. Think of it like pickling a cucumber. That same cucumber can sit on the shelf for months or even years without rotting due to the chemical change it has undergone. That’s why your shop will smell like a deli when milling Accoya! Advantages of Accoya
Disadvantages of Accoya
To me, the advantages far outweigh the disadvantages, but I happen to be one of the few folks who live near a distributor of Accoya. That local availability is likely the reason you have either heard of it or not. My Thoughts on AccoyaFor about four years I have been using Accoya to build a variety of projects in my shop. We’ve made window sash and jambs, doors, porch flooring, custom moldings and even corbels (check out that video here!) I have painted it, stained it, drilled it, run it through a jointer, planer, table saw, mitre saw, shaper, and anything else you can do to wood and it has become a favorite of mine in most regards. Two issues when working Accoya are that it does create a little more blowout unless you use a spoil board because it is more brittle than some other woods like pine and cypress. Also, it does not turn on a lathe at all, too hard and brittle. The big wins for me are the rot and insect resistance and the dimensional stability, which means that my windows and doors will fit perfectly year-round instead of shrinking up and being gappy in the winter and swelling themselves shut in the summer. All of us woodworkers have our favorite woods to work with and it’s hard to convince most of us to try something new and relatively untested, but in my experience, Accoya is worth taking a look at and seeing if it might be worth a try in your shop. At the time of this writing Universal Forestry Products (UFP) seems to be one of the only distributors of Accoya in North America for now. I’m hoping that will change and it will become easier to get your hands on. Have you tried Accoya? Let me know your thoughts in the comments below. The post Have You Heard of Accoya? appeared first on The Craftsman Blog. from https://thecraftsmanblog.com/have-you-heard-of-accoya/
In this post I’ll show you the basics of how to read a tape measure, which I’m hoping you already know, but I’ll also cover the special features on most tape measures that can make sure you measure everything perfectly the first. You might even be able to measure once, cut once after you read and watch this! 1. The LockEvery tape measure has a lock to keep the tape from pulling back into the housing. This is tape measure 101. Pull the tape out, press the lock down, and the tape stays where it is until you release the lock. Some tapes have an automatic locking mechanism that locks the tape as you pull it out and then you have to press a button to have the tape return. I’m not a fan of those, but different strokes for different folks, right? 2. Basic Measurements
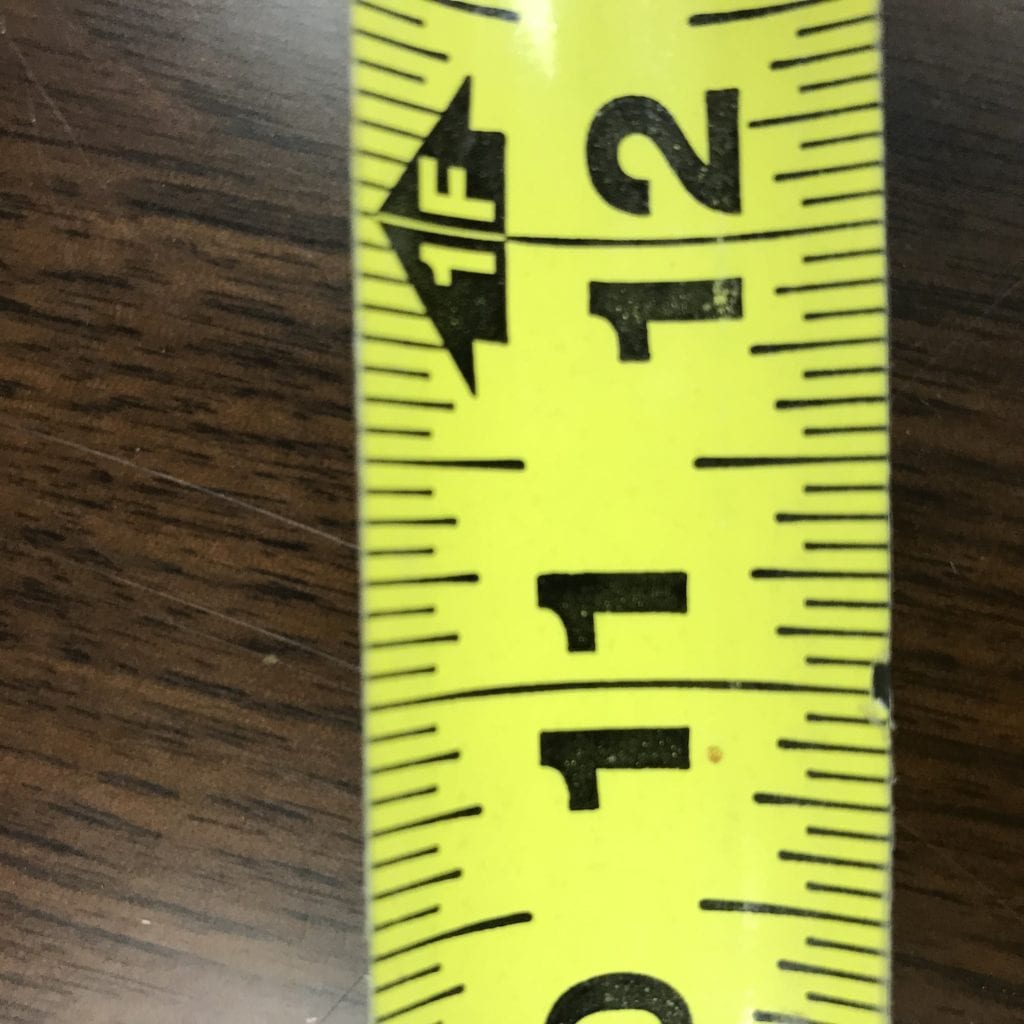
For most measurements, find the inch marking and then count your hashes till you get to your fraction of an inch. Some tape measures also have a simple way to show your measurement in feet and inches. Instead of reading a 95″ measurement. You could read it as 7′ 11″. Those are helpful if you don’t want to start dividing your inch measurements by 12 all the time. 3. 16″ O.C.
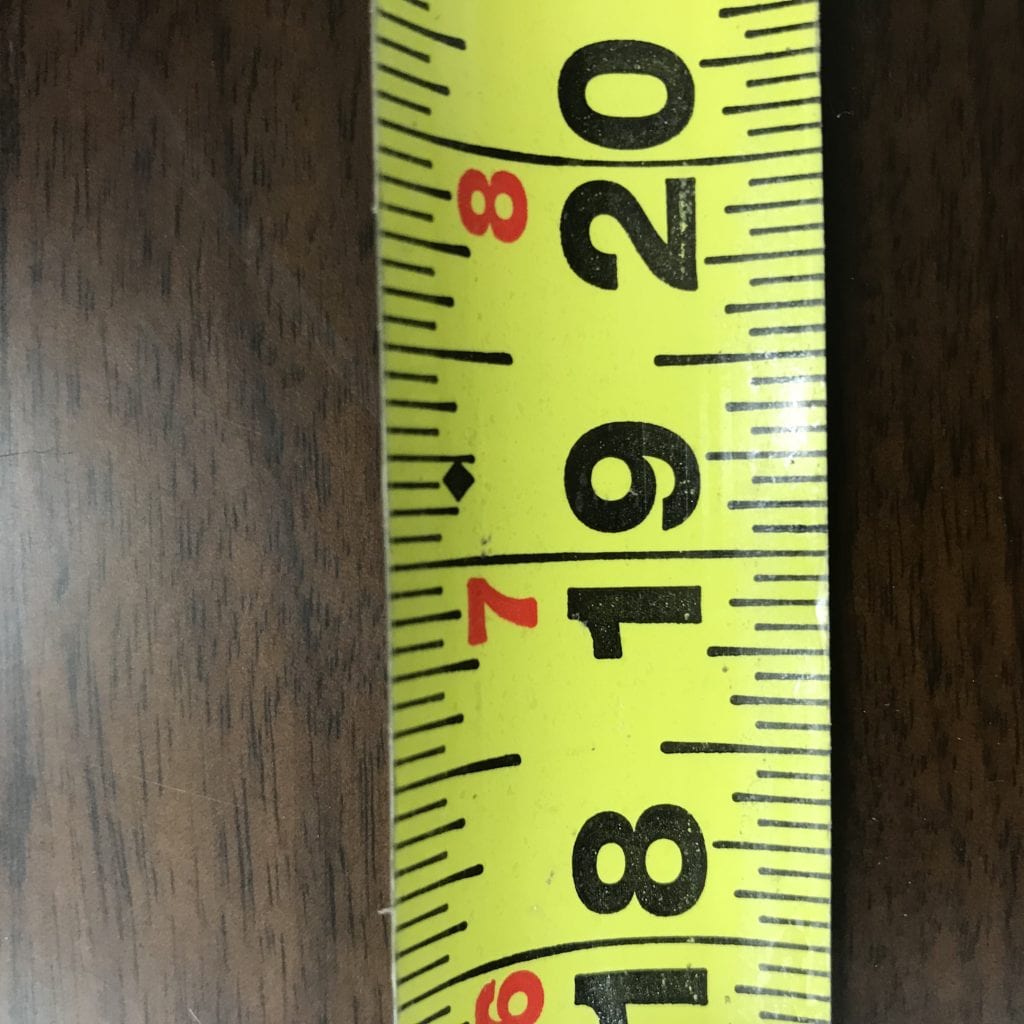
4. The 19.2 Black Diamond
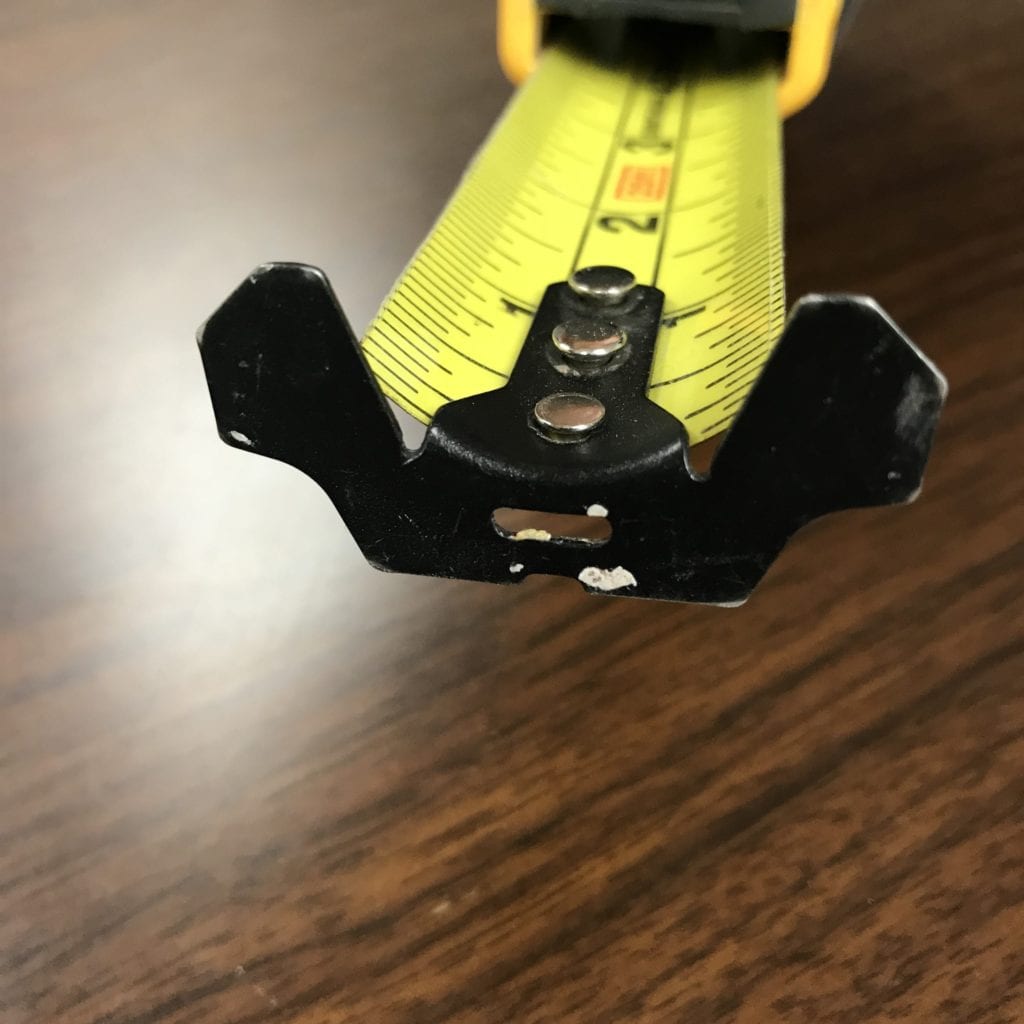
When you divide an 8 foot wall into 6 studs you get a stud every 16″ which explains the red number every 16″. If you divide that same wall into 4 studs you get a stud placement every 24″ which is pretty darn simple. But what happens when you divide that same 8 foot wall into 5 studs (or in many cases 5 rafters)? To get 5 studs evenly placed in an 8 foot wall they should be placed 19.2″ O.C.. That is why that little black diamond appears every 19.2″ on your tape measure. Roofs don’t often require the same spacing for their framing since they don’t carry as big of a load as walls and a 19.2″ spacing saves lumber and time as long as you know how to read a tape measure and use those diamonds to your advantage. 5. Hook Tab
6. The Tape Body
What else did I miss? I know y’all have tricks about how to read a tape measure that make your tape measure one of the most versatile tools in your pouch and I wanna hear your thoughts in the comments below. The post How To: Read a Tape Measure appeared first on The Craftsman Blog. from https://thecraftsmanblog.com/how-to-read-a-tape-measure/ |
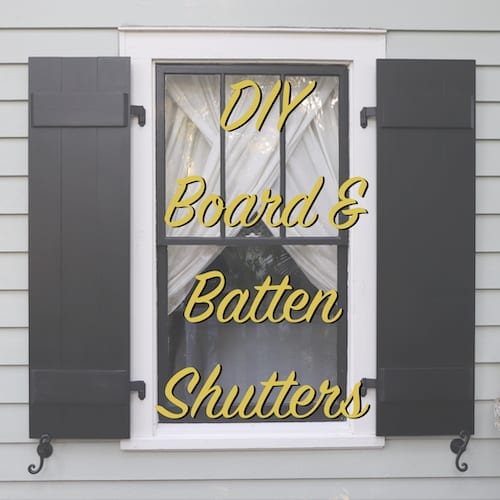 Board and batten shutters are a simple and attractive historical option for shutters that you can make without a bunch of complex woodworking tools. In this post, I’ll help you pick the right wood, measure for success, the step-by-step build, and the hardware to make it all work.
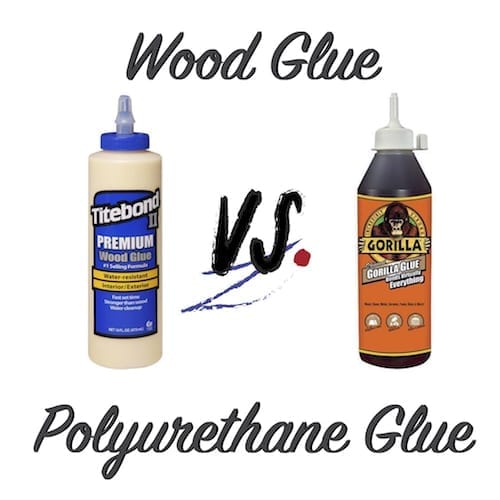 Finding the right glue for your project can be tough. There are a a lot of options out there to sift through and each brand has its own version of each type of glue. This post won’t go into all of the different types of glues, but rather, I’ll focus on two of the most popular types of glue on the market- wood glue vs polyurethane glue.
 Sound “click baity” and too good to be true? It most certainly does, but it is very attainable to slash your energy bills by $300 this winter at your house. How much you save depends on how many of these tips you do and to what extent. I’d wager that you’d be able to save even more than I promise, depending on the specifics of your house and climate.
 What is Accoya? No, it’s not a bookshelf at IKEA. It’s the next generation of treated lumber that I have been experimenting with for a few years now. The results have been surprising and I’m ready to give you my thoughts.
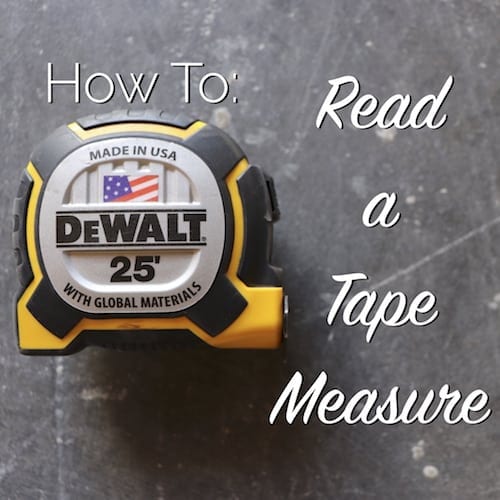


 RSS Feed
