
I thought the hard decisions were done when we picked out our kitchen, turns out of course, I was totally wrong. Kitchen handles. Too big, too small, questionable quality, too expensive, sticks out too much - it goes on. And I mean THAT was after we'd decided on the type of metal/finish as well. Chrome, Stainless Steel, Copper, Matt Black, I could be here all day. We did however eventually decide Satin Nickel was the finish we wanted - it matches our tap and our lights and it also ties in nicely against the stainless steel appliances as well (cooker hood and fridge). Our second choice was polished chrome, but it wasn't quite rugged enough for us and with polished chrome stuff, it's always pretty hard to keep it looking 'polished'. So with the choice of metal picked out, we then began looking for handles. 
Turns out, there aren't all that many choices for Satin Nickel out there. I knew I wanted knobs for the doors and cups for the drawers - I really like the look of both these type of handles and having two different ones makes it a little more interesting. Plus I think cups are more practical for drawers than knobs.
Finding the right knobs wasn't too difficult - these ones from Ironmongery Direct stood out to me instantly, although they came in two different sizes (32mm and 38mm) which was another decision to make, although I felt this one relied on which cup we would go for. I'd ordered cup handles from from John Lewis (too small), eBay (questionable quality), Door Handle Company (didn't stick out enough - i.e, my chubby fingers felt like they wouldn't fit) as well as Ironmongery Direct (which I felt stuck out too much - can you win?). I pretty much exhausted the market and these were literally the only choices available that I could find. So I stuck it to Instagram to pick, since they're my trusty advisors nowadays. Also - TOTALLY rate the use of blu-tac for testing knobs on door/drawers prior to installing. I mean I haven't seen blu-tac since I was about 13, but this was the job it was made for. ? Although do be careful they don't fall and dint if you have hard floors!


The outright winner was the cups from Ironmongery Direct (A) - the ones I felt stuck out too much and these were also the largest in size. But, people said they preferred this cup over the others based on the fact it didn't have screws showing on the front. This also makes them the hardest to fit! But, I feel like the people of Instagram know what they're talking about (most have far more style than I will ever have) so these ones were the ones we went with. Since they're quite big, we went for the larger 38mm knobs as well. The smaller ones just didn't look right against these cups.
Fitting the knobs was pretty straightforward - but we firstly had to decide on a location. Some people have them in the middle of the doors (more bending down to reach - not for us!), far in the corner of the door (our knobs are quite big so looked a little squished) and some people have them level & in-line with the bottom of the top outer wooden panel - again not so keen on this personally. We decided to attach them around 3/4 the way down, between the top of the door and bottom of that top outer panel. Am I making sense? I totally recommend checking out Instagram & Pinterest to see how people fit them differently - it can a big difference to how they look on the doors!

So the measurement of this, was 6.5cm down from the top of the door, and 5cm inwards (which was central in the outer panel). Using a set square I then held this against the top and side of the door and marked this up on the front of every door with a cross. 
Grant then drilled through the front, so any scuffing would appear on the back out of the sight. The knobs then attach with screws through the back of the doors. Super handily, they even came with two different lengths screws, so they can be used on different thickness woods. I absolute love these knobs - they've got such a satisfying grip to them (weird as that sounds), easy to fit and they look beautiful! ?


The cups were a little harder to install as marking up two holes that attach through the back took a fair bit more thought. The simplest way I could think to do this, was to create a template. So that's what we did.

This is just made out of card - I drew around the handle and cut it out, then marked a line down the centre and drew around the screw holes, piercing through the card where the screws would be.
We decided how high from the bottom of the drawer we wanted the handle to sit - which we decided to align with the knobs, so that the tops of both were level with one another. We then figured out what the distance would be between the bottom of the cup and the bottom of the drawer. Using a set-square, we marked that line out. (this was 4cm from the bottom of the drawer). We also marked a line down the centre of the drawer as well. We could then hold the template against both lines and poked a pencil through the holes on the template to mark up where we needed to drill for the screws. Preeeetty simple.
 

It worked pretty well, the only thing we hadn't accounted for was how low the screws would be on the inside of the drawer. This is what I mean...

How close/freaking lucky? Literally a few mm lower and this would have been a total fail. Just high enough to still be able to screw into, and luckily high enough to not have damaged the base of the drawer. We got very lucky on this one! Definitely recommend checking your holes won't damage the base of the drawer FIRST.
When it came to the bigger set of drawers - I consulted Instagram again as to whether we should have one or two cups on them. My vote was for two, Grant felt one was enough. Here they are demonstrated again by the power of blu-tac.


Two totally won. So that's that we went ahead with. Huge thanks the people behind the phones of Instagram for all your renovation help with all our decisions ;) Due to the size of the drawers, we had to purchase a bigger set-square. But once we'd marked up one cup, we could translate that measurement across all the drawers without the use of the template.
We also used the same method for the dishwasher too. And this is how it all looks now! (PS. I realise some of these doors/drawers need a bit of a clean after being manhandled!) 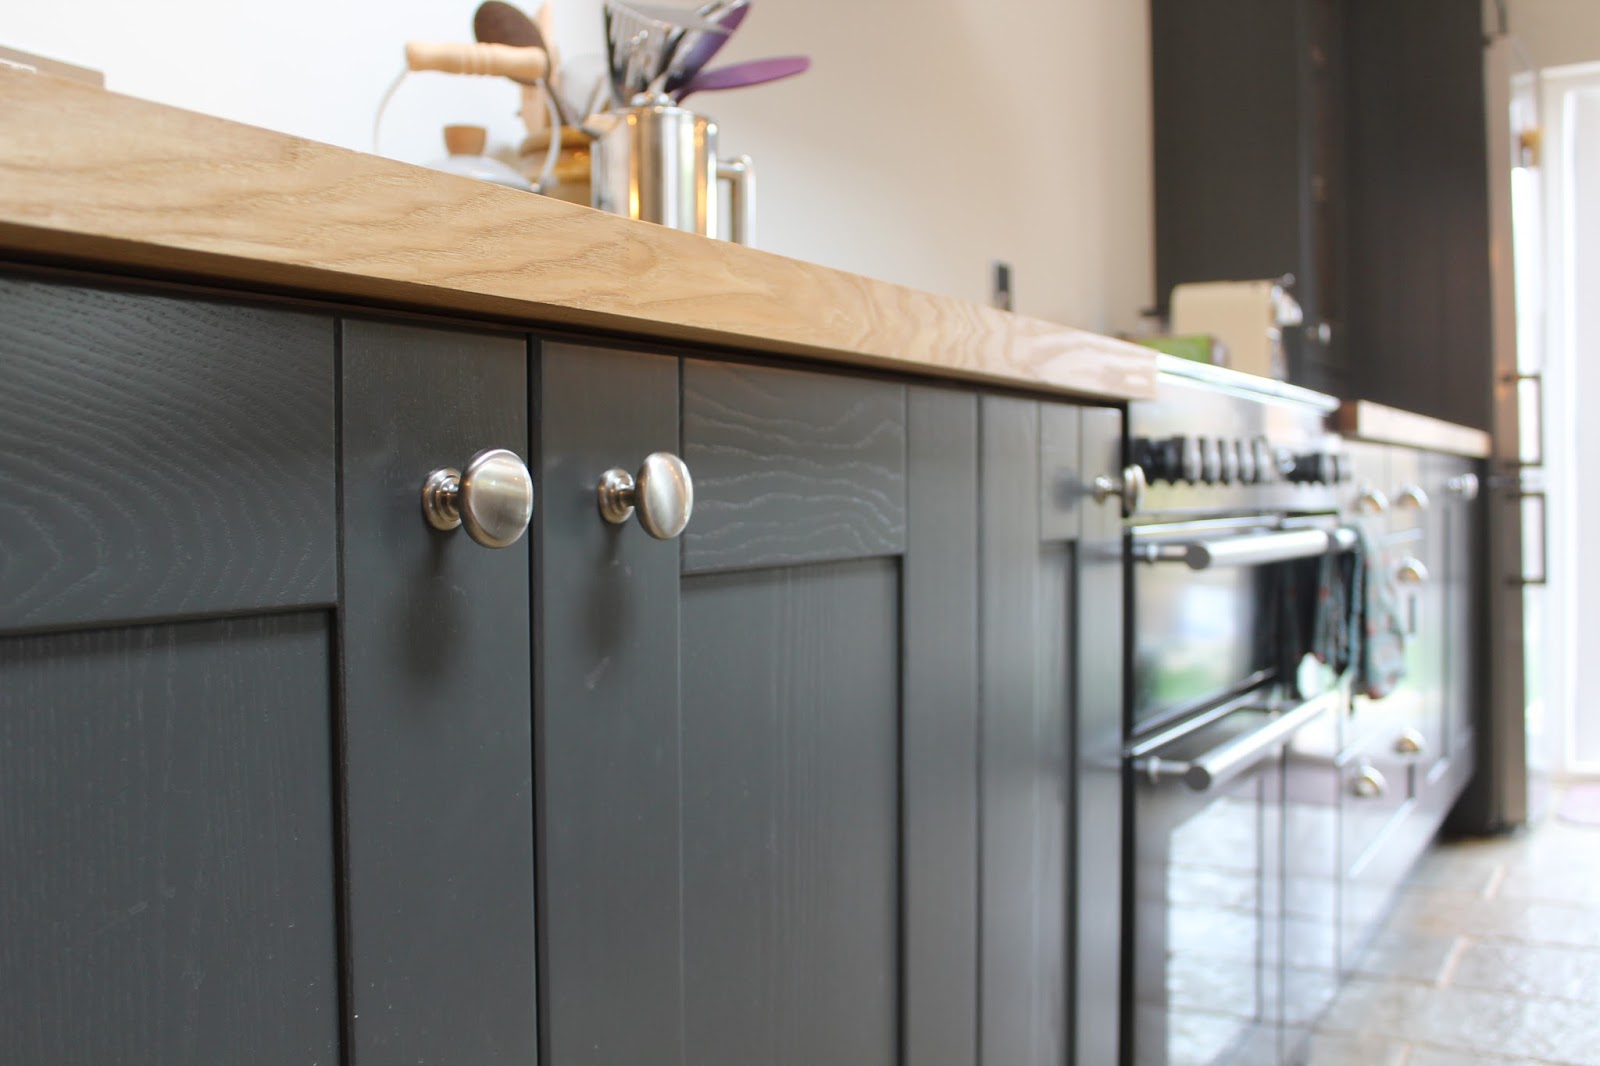


Not going to lie - super glad I no longer have to open doors from the bottom, or open every single drawer just to reach the top one. It's slightly reliving to say the very least. I really love the look of the handles - even the cups that I thought stuck out a lot/were rather big. Once you get used to them, they're really not that stand out or big at all! These were hands-down the best quality ones we looked at as well - they're quite heavy, don't feel rough on the underside of the cup (the eBay ones felt like shite underneath!) and as I already mentioned, they even came with two different length screws depending on thickness of doors, which I thought was pretty thoughtful too. So it all came together in the end - and somehow I think having handles on the doors really makes it look so much more kitchen-like!
You can find the full range of these handles here - they do also come in other finishes if you like these but are after a different kind of finish. And they also have a few different other designs too - but the brand is definitely very well made and I would totally recommend!
Let me know what you think :) Do you struggle with every renovation decision going as well? ;)
Costs:
(rounded to the nearest pound)
New Tools Purchased:
300mm set-square £5
Materials Used:
10x Knobs £34
10x Cups £40
Total: £79
from http://www.kezzabeth.co.uk/2017/09/choosing-fitting-kitchen-handles.html
0 Comments
Leave a Reply. |

 RSS Feed
