3 years ago I built a raised bed in the garden against the low-level brick wall between us and our neighbour. I built it with the intention of growing some climbing plants that would block out the view of the next-doors driveway (and the adjoining road) and give us a bit more privacy. Well, that didn't work out. Actually, I tell a lie - it did work out, but it worked too well. What I mean is, one of the climbers I had picked (a Solanum Crispum I believe) was on a mission to take over the world. It grew wilder than wild, quicker than the speed of light and basically became a nightmare to control and ended up being more of a pest than anything. So last year I dug it back up and decided I needed a new idea.
My new idea was pallet fencing. Three years ago I was totally against the idea of fencing - I don't know why? I think it's perhaps because I like the idea of continuity around the garden, and on the opposite wall we have some lovely large shrubs that act as privacy all on their own. I thought I could re-create the same effect on this side, but it turns out I couldn't. After our neighbours (on the shrubbed wall side) added additional fencing to some of the more sparse areas of foliage, the garden matched no more anyway and it gave me the perfect opportunity to put fencing up.
But, fences are expensive and because I like to save money, I decided to do something a bit different. Cue - pallet fencing! And of course, I'm going to show you how you can make your own and save a ton of ££ too!
You Will Need:
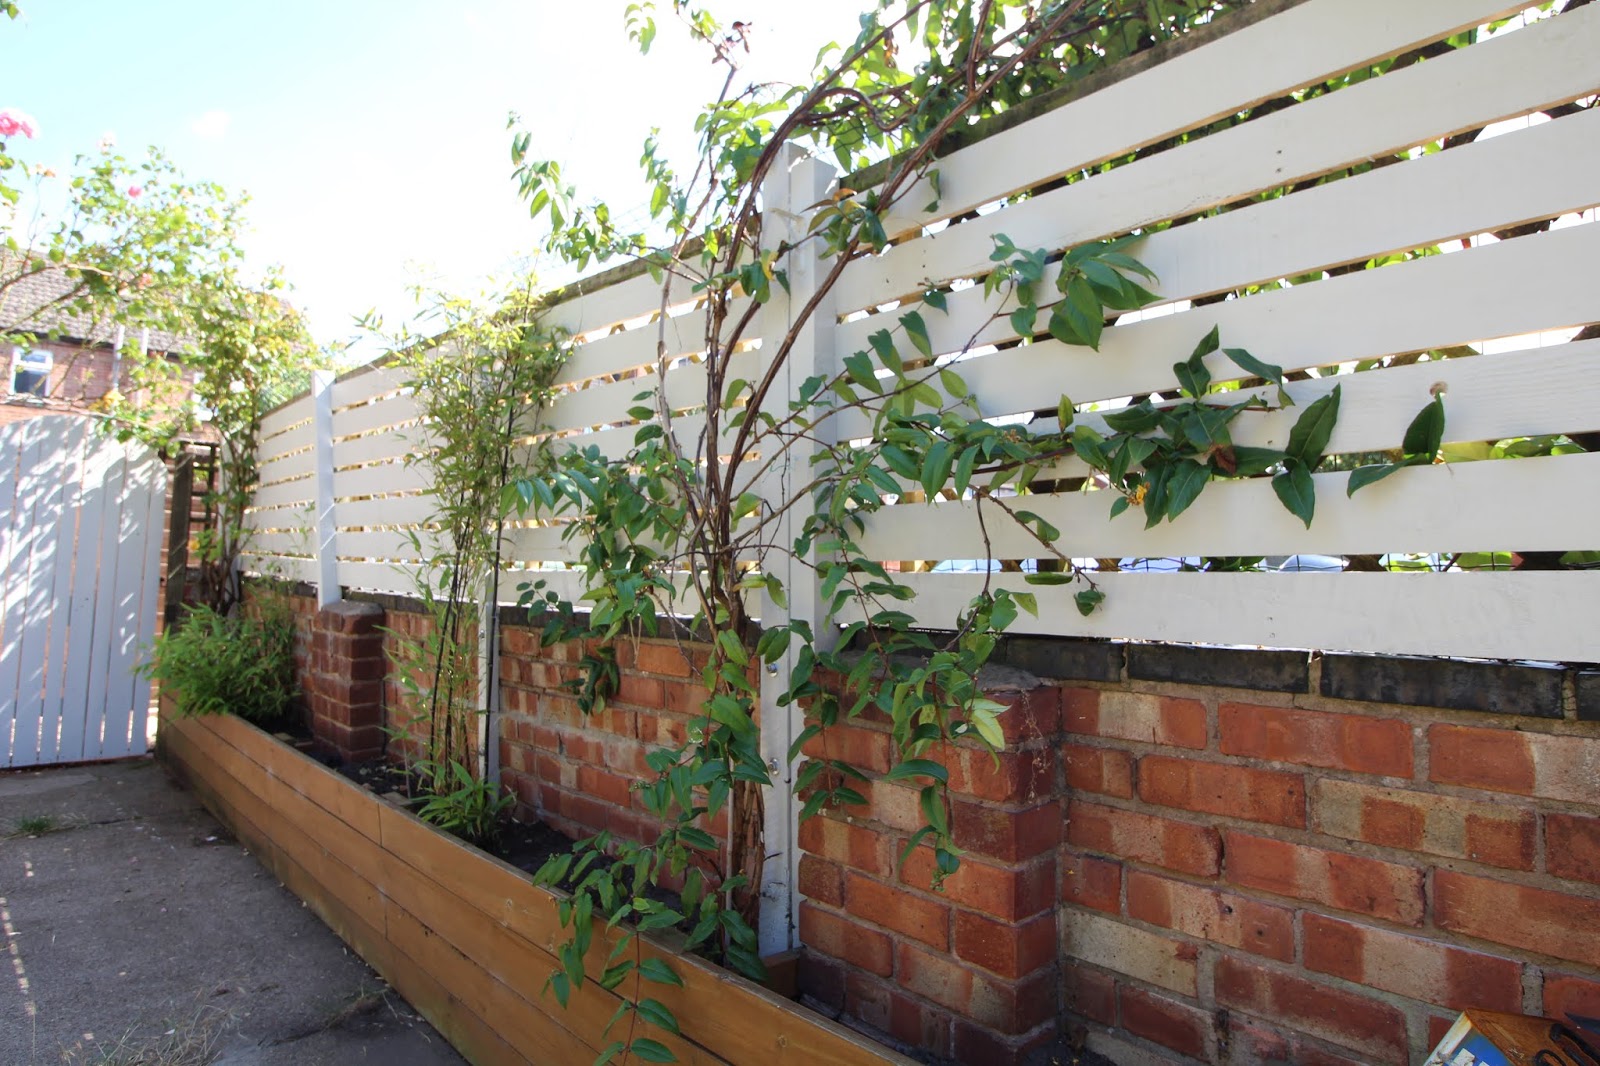
First things first, here's a quick look at what we were personally dealing with. We have low-level walls with a kind of trellis over the top (these were already here when we moved in!) which are attached to fence posts. After moving in, we added reed-screening for additional privacy, but that has since fallen down and it's now all looking a bit scruffy.
We'll be keeping the trellis in place to build on top of, but you definitely don't need one in order to complete this DIY.
So here's what we did....
// (adsbygoogle = window.adsbygoogle || []).push({}); // Step 1 - Affix New Posts
Whether you're adding fencing to the top of an existing wall (like us!) or not, you will need to have some fence posts in place, as this is how we'll be affixing the pallet planks in position. If you already have fence posts in place, you can skip this step altogether.
If you don't, and you also don't have a brick wall like ours, you will need to dig into the ground, pop the post in and secure it into position with postcrete. I don't have a blog post for that (yet) so you'll have to check out this video for help on that.
If you have a low-level brick wall like us - the good news is that you can just affix the posts onto that. We already have a fair few in place anyway as that's how our trellis has been installed, but we needed to replace a couple and we're also adding a few more to support the trellis even further. We're actually not taking the trellis down (seems a bit of waste?!), so we'll be fixing our pallet planks on top of it instead.

We used two methods to fix our new fence posts to the wall. One of them involved drilling a hole all the way through the wall, inserting a threaded rod, bolting it in place with nuts and bolts either side of the wall, and then cutting the excess off from the rod, which you would need an angle grinder to do. This is how our existing posts are attached, however for this method, you would need access to the other side of the wall. Don't worry though, I have an alternative method if this one isn't for you! But, here are some shots of how this process looks...


For the simpler, albeit it slightly more expensive method, we used concrete bolts. These are basically special bolts which screw straight into the brick, no wall plugs required. Simply drill a hole the same width as the bolt, straight through the fence post and into the wall, only going as deep as the bolt will sit. Then, screw the bolt in!


You'll need to use a ratchet to tighten the bolt into the brickwork, and voila, your fence posts will be full secure.

Literally, it's as easy as that. We're super impressed with these bolts and can't believe we haven't used them before! I would definitely recommend for any outside projects.
// (adsbygoogle = window.adsbygoogle || []).push({}); // Step 2 - Sourcing Pallet Wood
The two best places I've found for finding free pallet wood is Facebook Marketplace and Gumtree. While there are a fair few free pallets to be had, finding a bulk amount of pallets which are all the same size is much easier said than done. If you're aiming for a consistent finish on this project or any other, mismatched free pallets isn't always the best way to go.
In which case, bulk sellers may be a better option as they usually have a large quantity of the same stock. Despite having to pay for them, it can still work out much cheaper than buying wood new from a DIY store. And of course, this way you can at least guarantee the planks will be of the same size. We buy ours from a farm local to us (who also dismantles the pallets and sells the wood separately) for 70p a plank, of 2m length. It's relatively affordable, although yes, I'd prefer it to be free! ;)
Another way to get free pallets is asking smaller businesses if they have any pallets going spare or are willing to sell you some on the cheap. After all, if you don't ask - you don't get! Our local Jewsons often give away scrap pallets from time-to-time.

If you need to dismantle any pallets, I recommend this Roughneck Lifting Bar tool. It makes the job a lot easier, but don't expect the pallet to fall apart for you; you will still need to use a fair bit of elbow muscle. ?
For this fencing DIY, I recommend the longer and bigger pallets. As obviously, the longer the slats of wood are - the fewer fence posts you will need! The photo above isn't the actual pallets we used for this particular DIY.
Step 3 - Cut Pallet Wood to Size
So as I mentioned earlier, the pallet planks will be attached straight onto the fence post, so you'll need to cut your pallet wood to this size. Simply measure the distance between the centre of one post to the centre of the next post and cut the planks with a saw.

// (adsbygoogle = window.adsbygoogle || []).push({}); //
We're actually fitting ours to the frame of the trellis instead so ours will be recessed against the fence post. We've added additional lengths of timber to the inside of the trellis frame with screws, and our pallet planks will attach to these. Hard to explain, but this is ours..


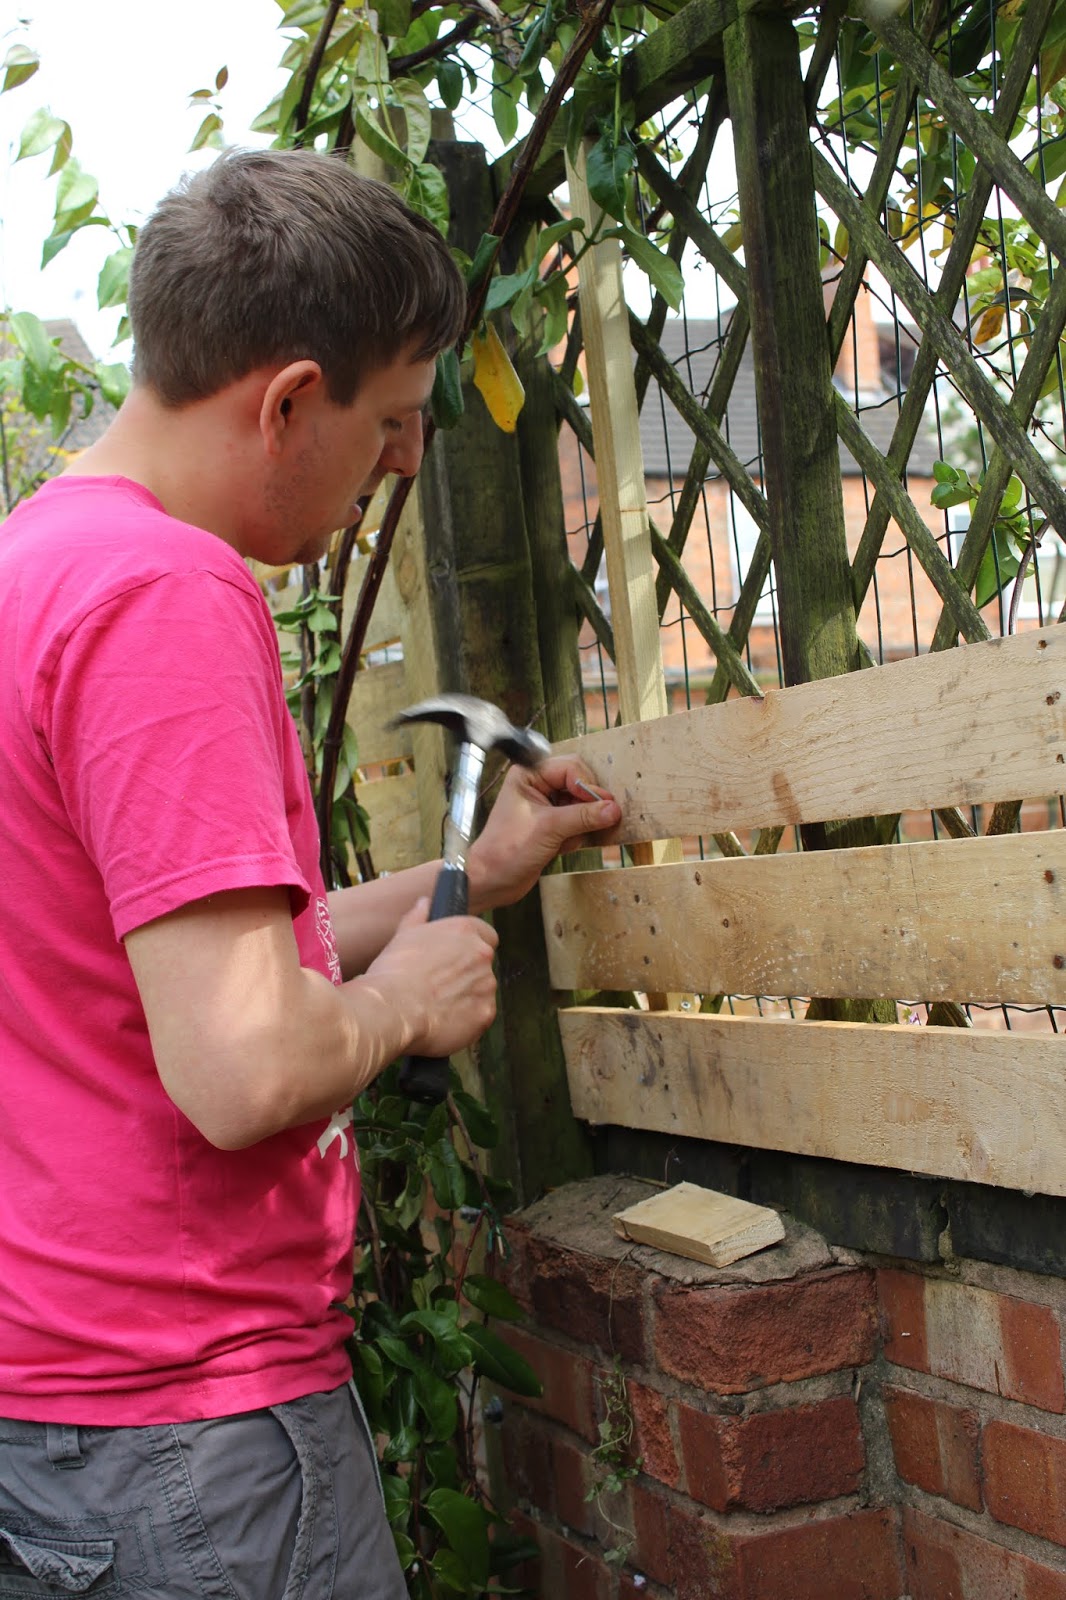
Step 4 - Affix Pallet Planks
You'll want to use either galvanised nails or galvanised screws to attach the planks, as these won't rust. Personally, I prefer the look of nail heads, but the screws are definitely easier to deal with.
All you need to do is simply pop a couple of those into either end of the pallet plank, straight through into the fence post. You'll want to make sure your plank is level with a spirit-level as you do this (although we've actually done ours level with the brickwork, which ironically is not level) and it's really as easy as that.
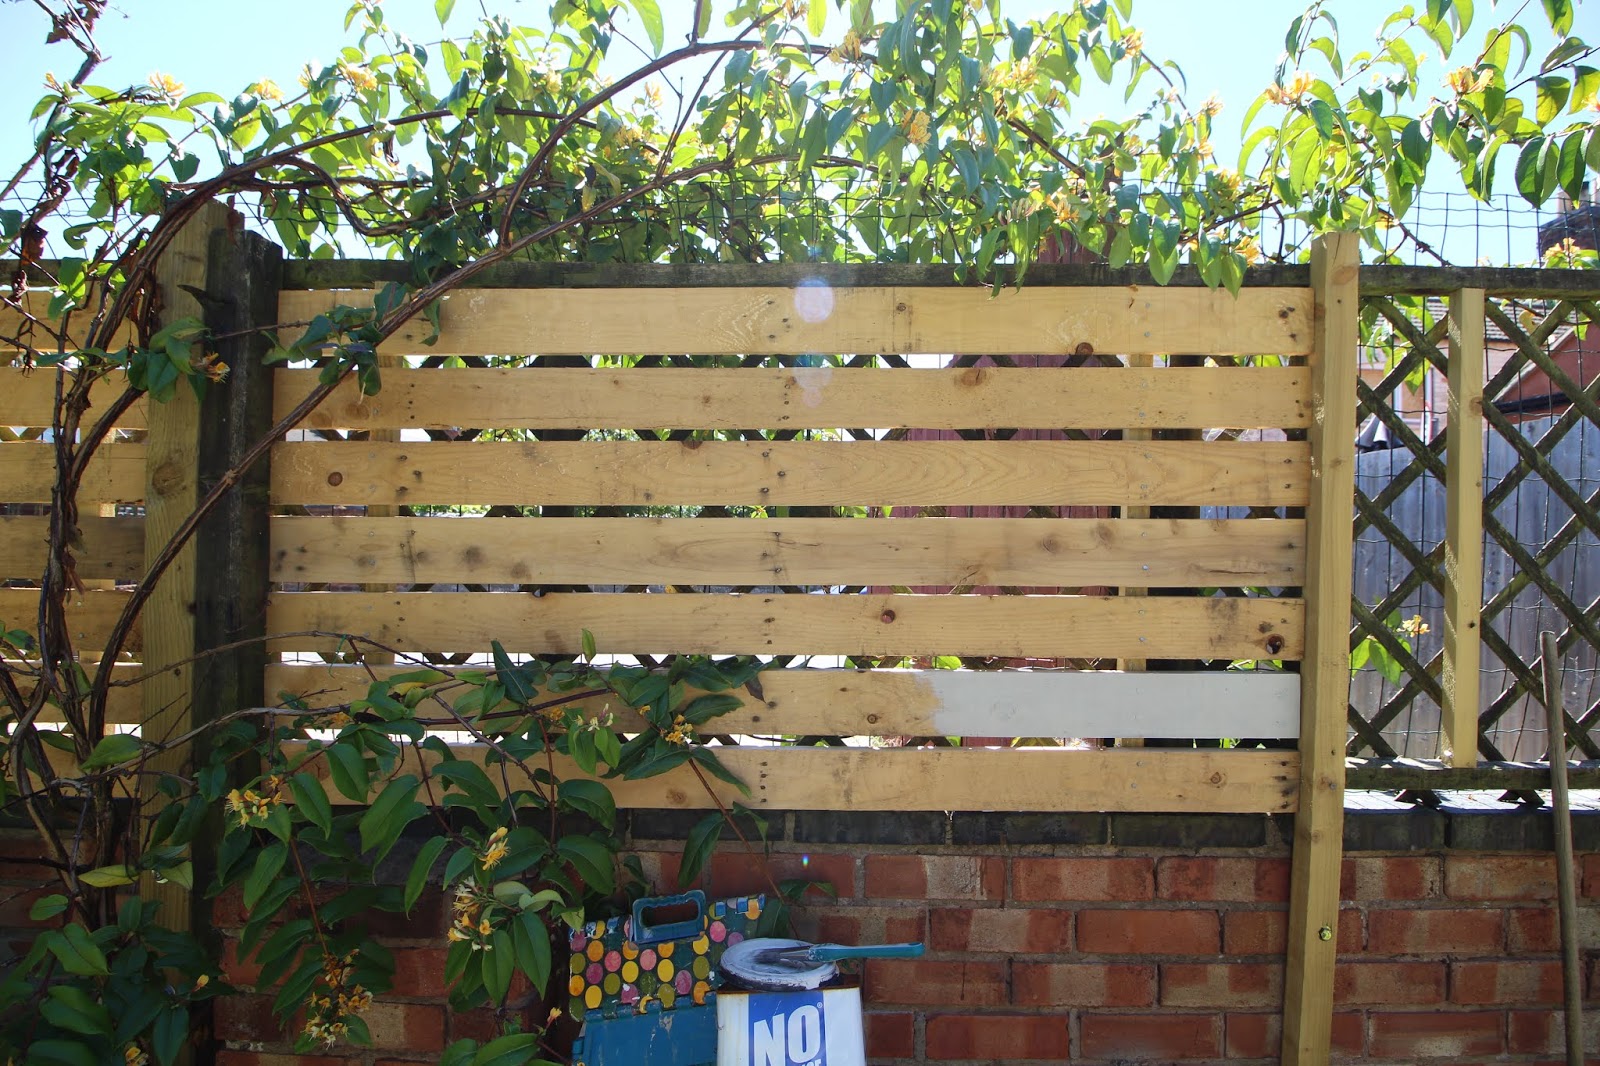
To space the pallet planks apart so that there's a gap between each of them, for the modern trendy look, you can just use an offcut of pallet wood to wedge between boards. This makes the gap a little over 1cm thick, which I think is perfect as it still gives you plenty of privacy.

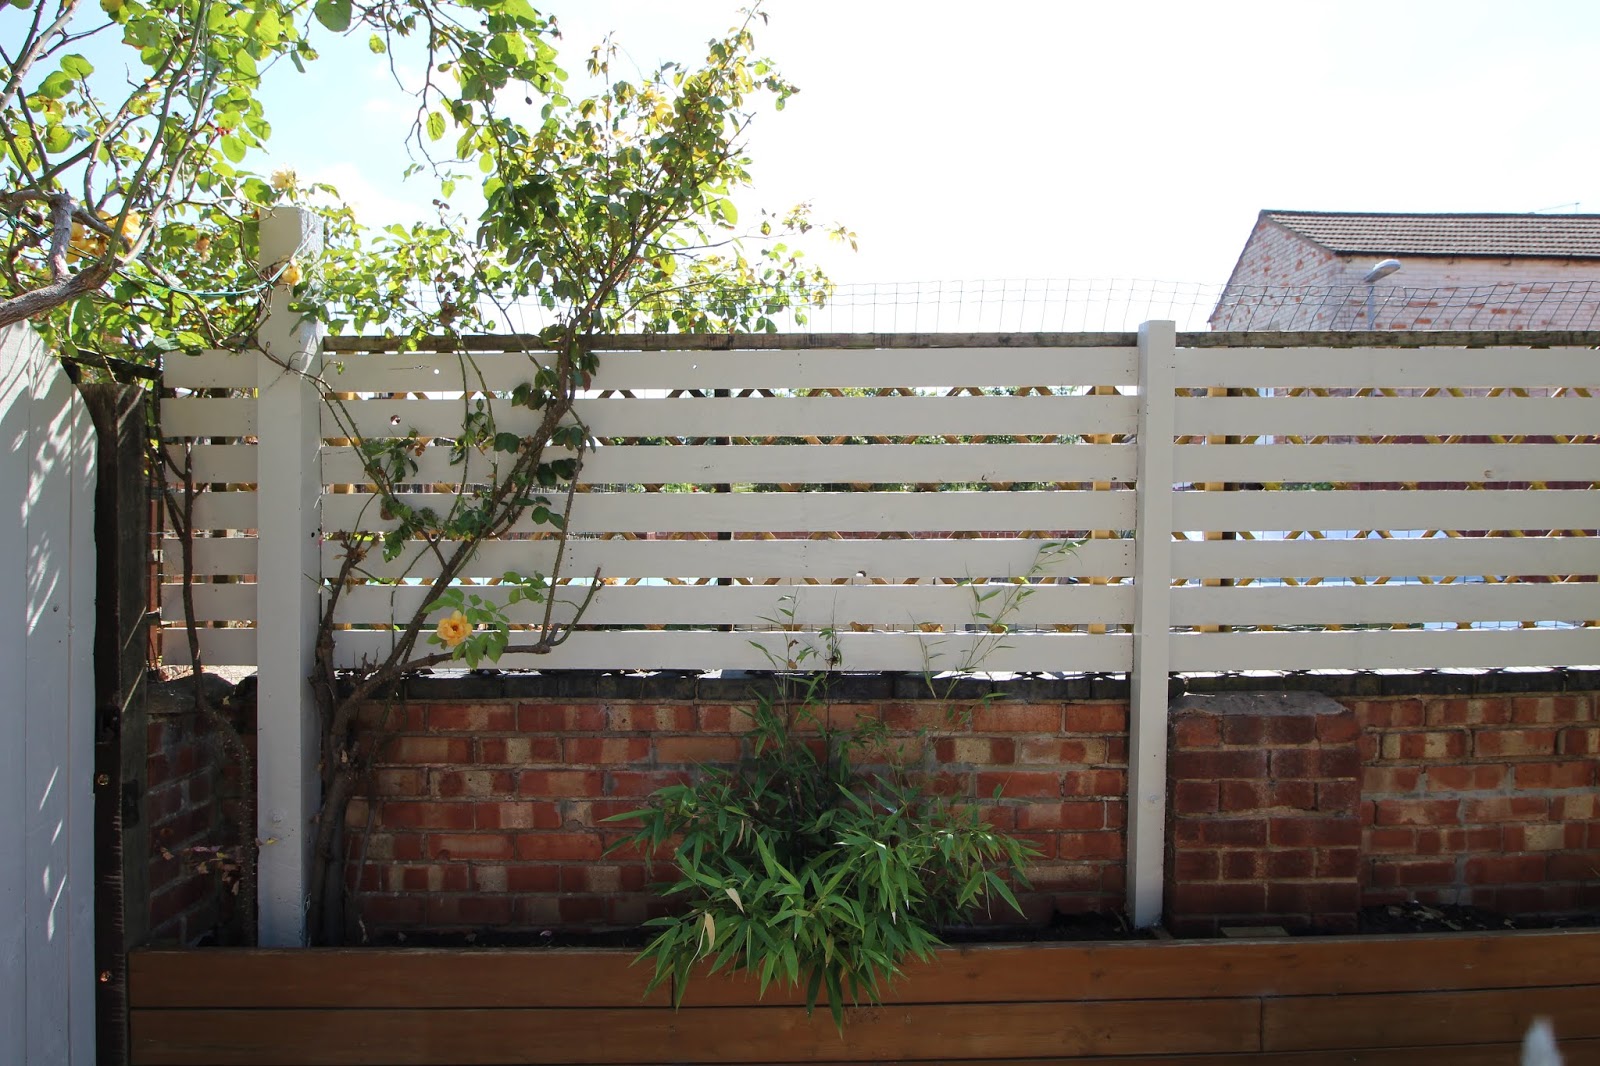
Looking pretty good right?! You can see how we've used pallet wood of a consistent width for an even-look finish. You could use varying widths for a bit interest though, it's totally up to you.


// (adsbygoogle = window.adsbygoogle || []).push({}); // Step 5 - Paint or Stain
Pallet wood doesn't usually need treating for outdoor use, but our boards were quite dirty and mismatched in tone, so I wanted to paint ours. I've used Johnstone's Garden Colour Range in 'Calming Stone' which is a kind of off-white colour with a hint of grey. It's much whiter than I anticipated actually, but it's added a really lovely fresh modern feel to the garden - and it's nice to have some painted wood, considering we have quite a lot of stained wood in the garden too.
I'd never used Johnstone's paint before but I really really recommend it. The coverage was amazing, you only need one coat for most wood and one tin went reaaaally far. Nothing lCuprinolinol which is watering as hell (sorry cuprinol!) I would definitely buy this one as a favourite in the future - and it was only £13.50 from Homebase!


And there you have it - one new pallet slat fence! We'll probably be doing this all over again at the back of the garden behind the roses bushes too, but not until they've finished their flowering season (we're sadly going to need to cut them!) and when we have a bit more cash to play with. For now, though, we have full privacy in the garden and I'm loving it!


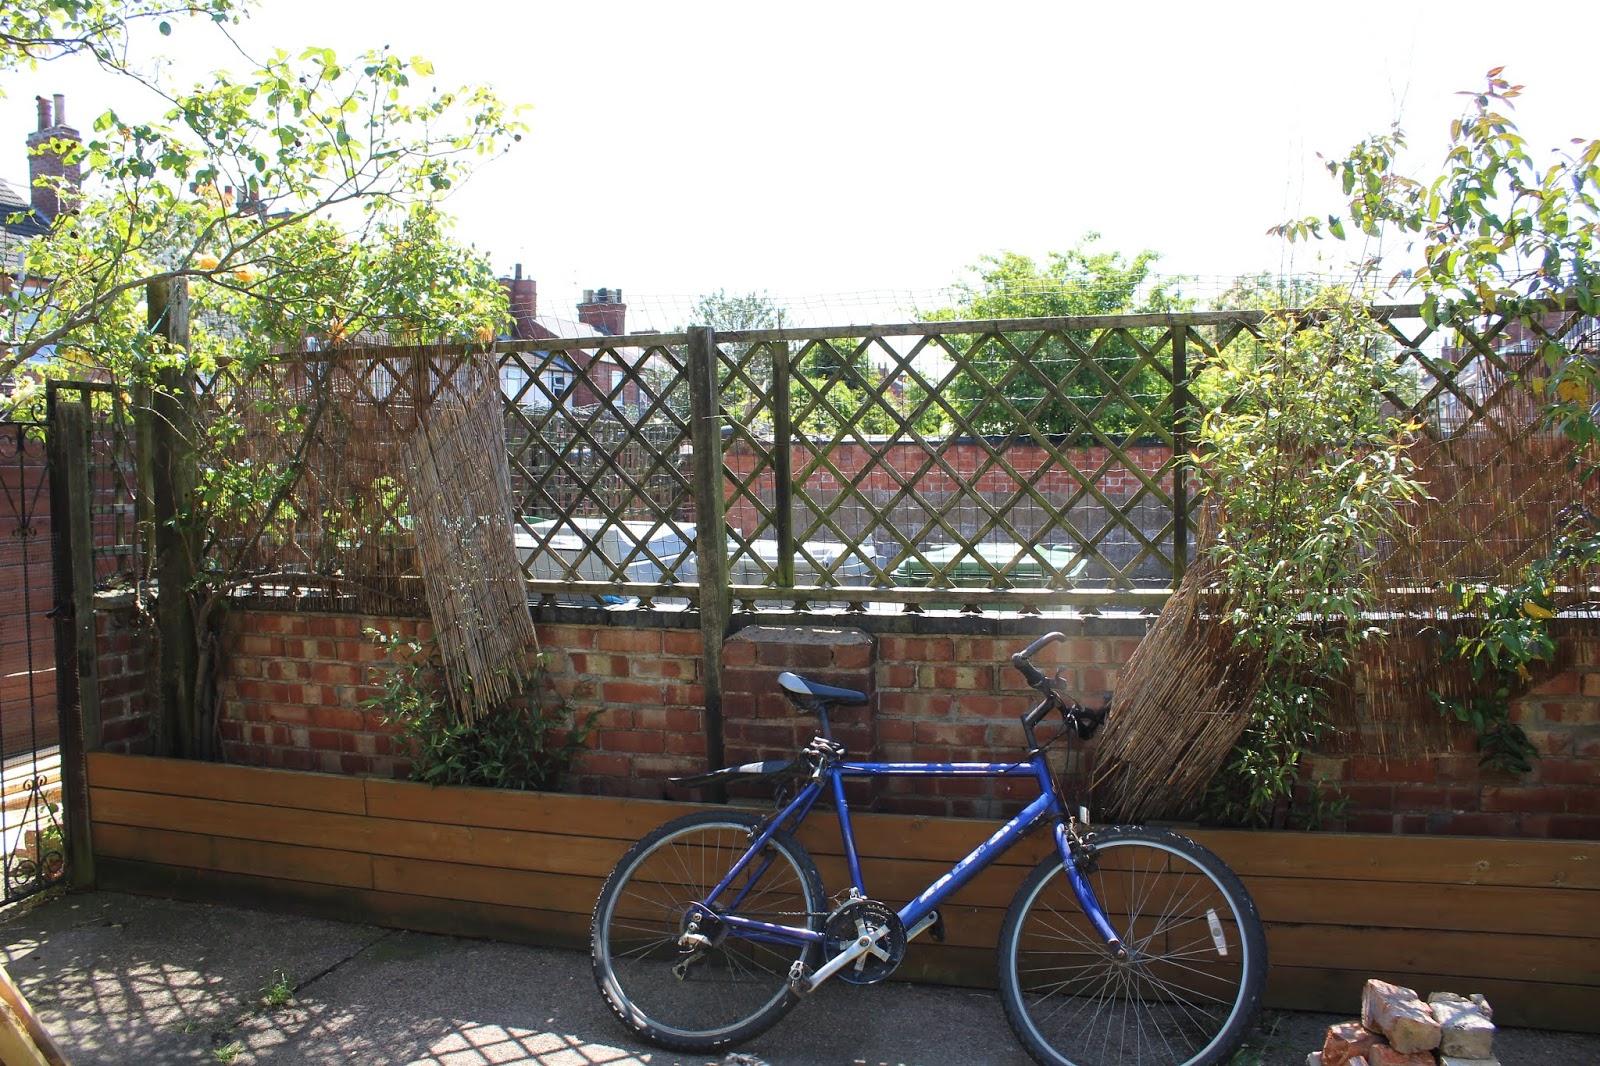
// (adsbygoogle = window.adsbygoogle || []).push({}); // And Incase You've forgotten what it looked like before. Here's a Before & After! 

Unless you have a trellis too, your slats will sit on-top of fence posts, so they should run almost seamlessly across the wall. Which is generally how most slat fences appear, and I think probably looks a bit better. We chose to do ours onto the trellis, mainly because our fence posts were of varying thicknesses - it just wouldn't have worked so well.
But, what do you reckon? A good alternative to real fencing? If you can stock up on free pallets - I think this DIY would be incredibly worthwhile for the amount of money you could save! And I think it looks pretty decent too. But obviously, I might be a tad biased ??
Total Costs
(rounded to the nearest pound)
New Tools Purchased:
None
Materials Used:
Fence Post & Treated Timber - £23
Masonry Bolts (10pack) - £8
Pallet Wood - £20
Nails - £5
Paint - £13
Total: £69
from http://www.kezzabeth.co.uk/2018/07/diy-slat-fence-with-pallet-wood.html
0 Comments
Leave a Reply. |

 RSS Feed
