
Luckily for us our house has most of its skirting and original architrave in tact and whilst it's not always in the best condition, I'm really keen to preserve those features. Sure they're massively overpainted, you can see where old sockets have been attached and generally speaking they just don't have that crisp fresh new look. BUT that suits me just fine. I love a house that sings its age - rustic floors, repaired skirting boards, overpainted architrave (within reason) - it's all about telling a story as to how the house has lived and been lived in. However, whilst we have most of the original skirting boards in tact, some have been removed and replaced with non-matching ones and this seriously bugged me. With the floorboards sanded, tiling finished and kitchen installed, we figured it was about time we sorted out our skirting boards too. We've changed the layout of our downstairs quite a bit (three rooms into one!) so we obviously had areas where we were missing skirting boards as well. I was really keen to re-instate new skirting boards to the areas that needed them, but ones that matched the original ones so I didn't have to replace the whole lot. Here's a snap of the original boards, albeit it with them looking a little worse-for-wear.. 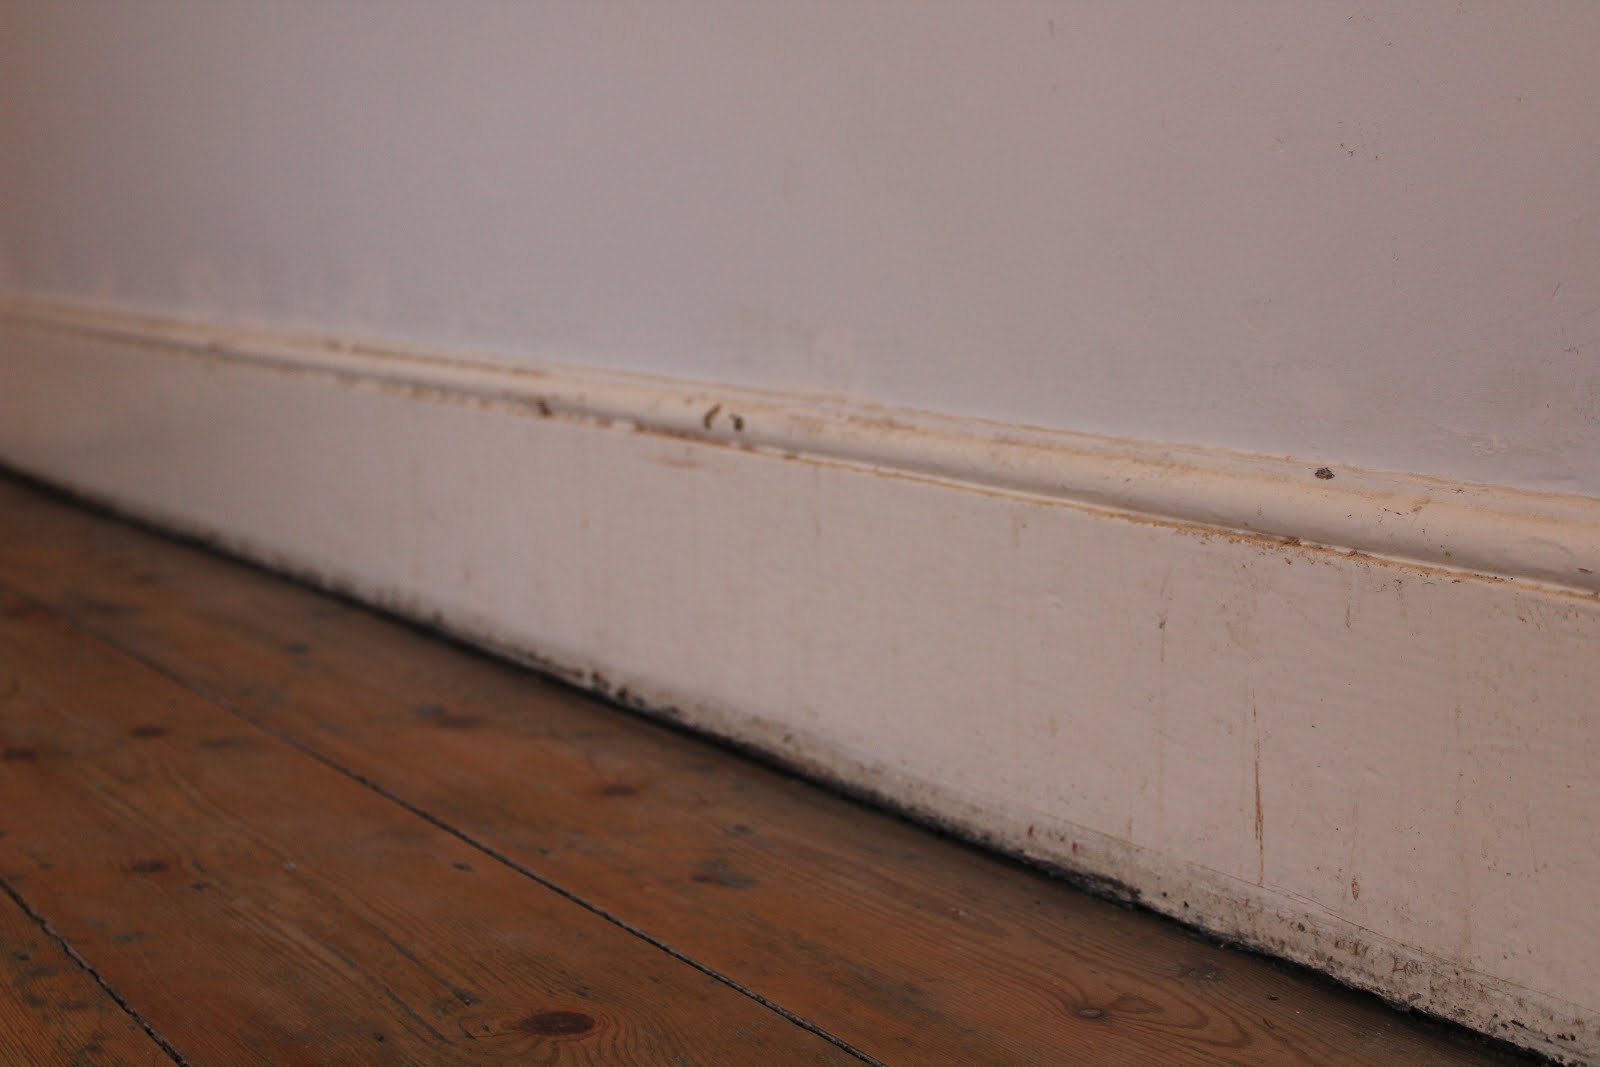
Matching old skirting boards for new ones is actually easier said than done as most DIY stores offer a very limited amount of profiles and only in a couple of different size/heights. Skirting World however, as their name suggests is a whole world of skirting and they have pretty much every kind of profile out there, with a total of over 50 different styles! That's a whole lotta skirting. And each one is sold in 12 different heights and 3 different thicknesses too. Basically if there's anywhere that will have a matching skirting board for your old ones, it's going to be here. We already matched some architrave last year for the kitchen from them (which you can read about here) and it was the first time we'd used MDF for woodwork as well.
Since then, I've been an MDF convert and I mean totally converted. No more bowed wood, twisted wood, warped wood, horrible knots - just a perfect length of board, every single time. It makes fitting so much easier as well. You don't have to pre-select the "best" piece of timber, nor do you have to try and reshape the timber whilst fitting - you know, hammering a load of nails into twisted wood in the hope of un-twisting it, and then of course splitting said piece of wood. Nightmare. We've bought a fair few packs of pine skirting board in the past - both in this house and our previous house and I can honestly said I've never bought a pack where every single board was perfect. Well, MDF is always perfect. Is it worth the extra cash? In my opinion, 100 times yes. So thankfully Skirting World did indeed have a matching skirting profile, at the right height and the right thickness too. Hurrah! We have the mini torus skirting, 170mm height and 15mm thick. If they don't already have a match for your skirting, then they can also make bespoke profiles to create an exact match as well - amazing! Here's a comparison of the old skirting agains the new skirting - I'm sure you'll be able to tell which is which - but it's pretty damn close match. 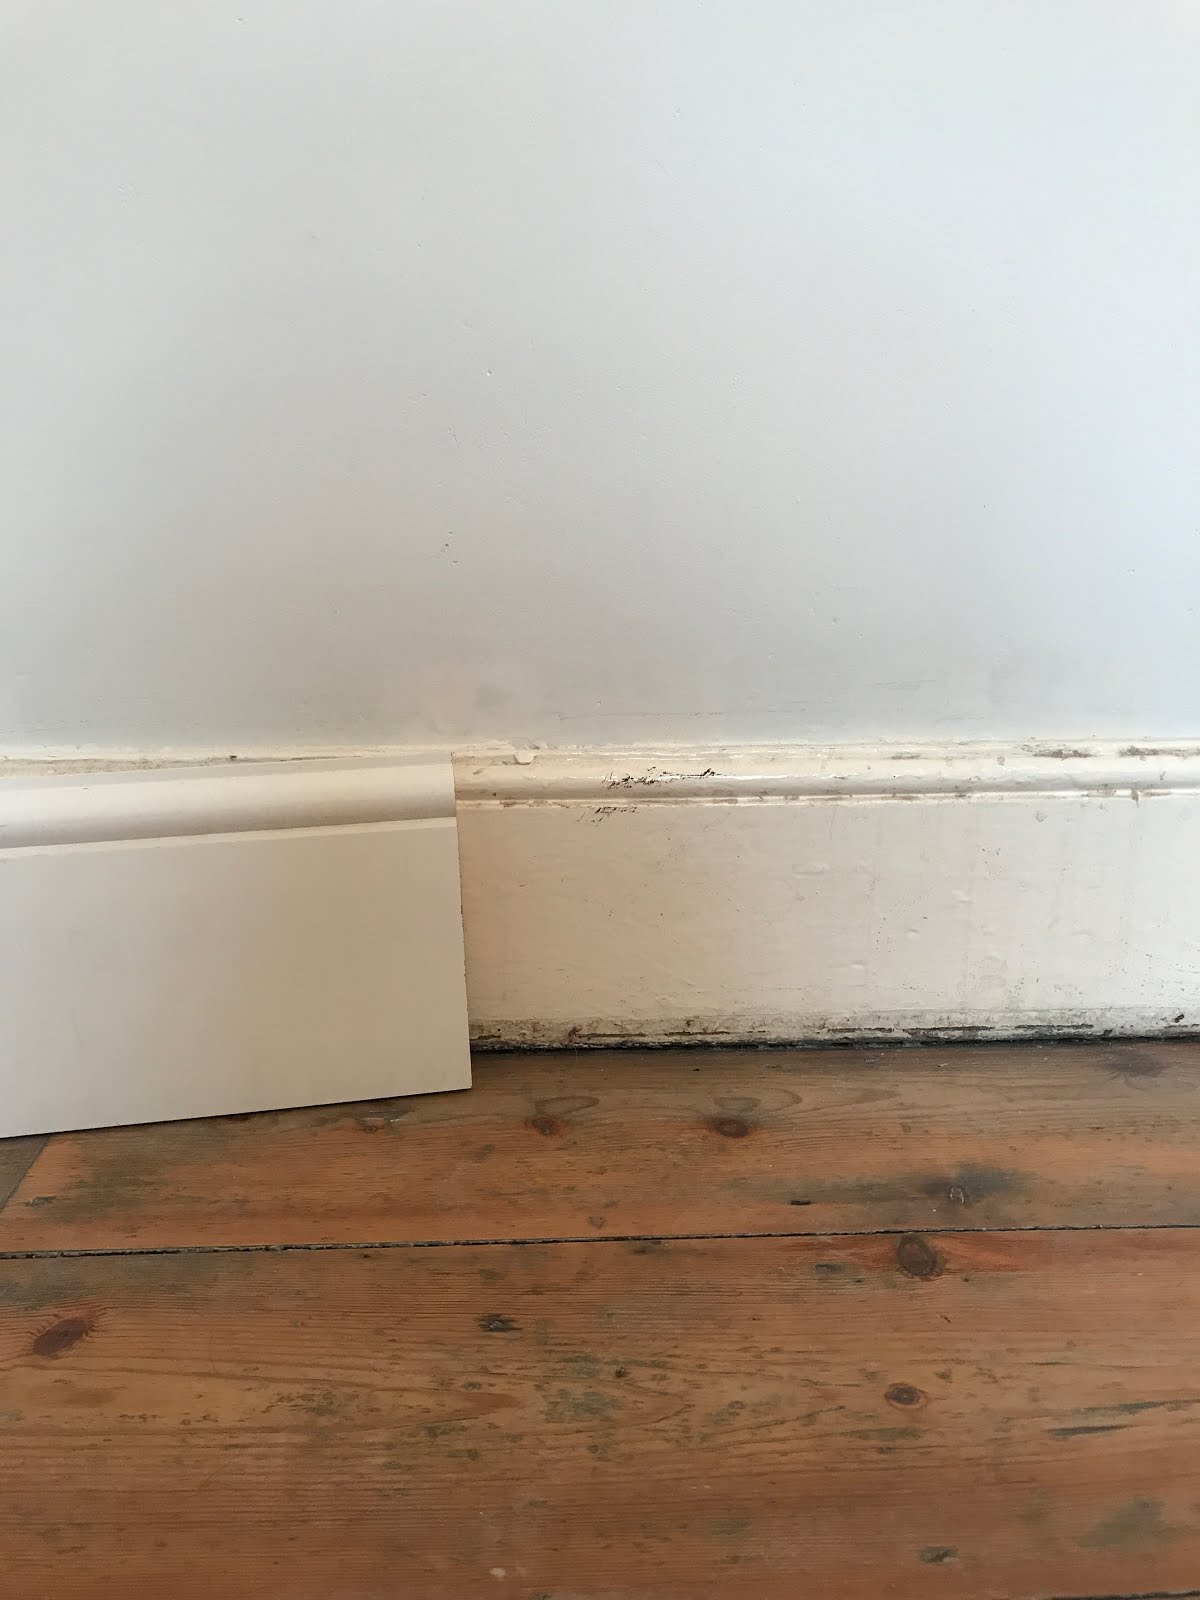
And here's a quick look at the not-so original mismatching skirting board we're placing as well. We actually think this length of skirting may actually be original, but the decorative top part has been sliced off - the horror! 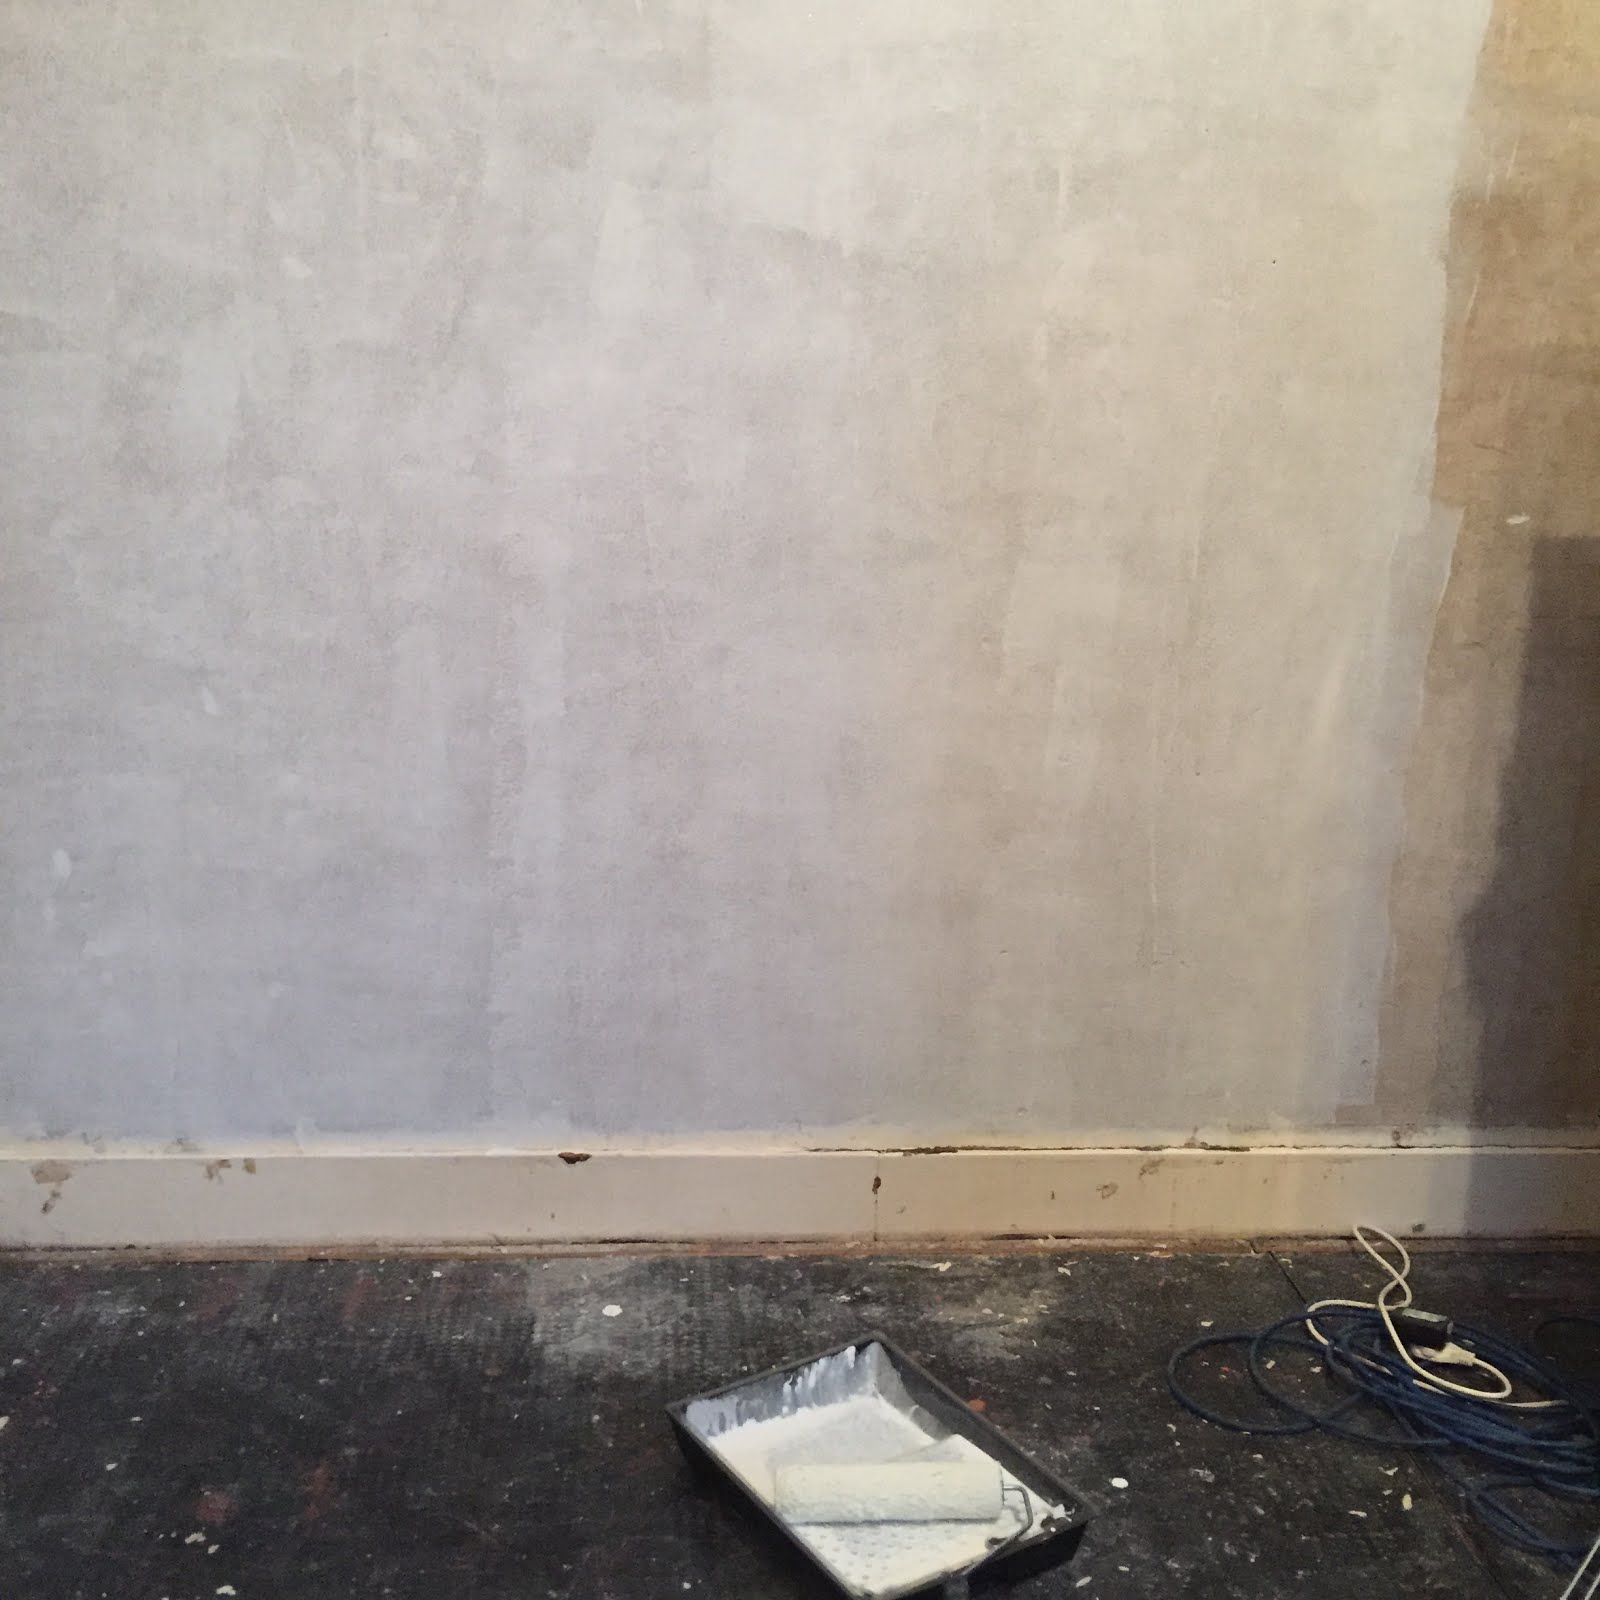
In order to carefully remove old skirting boards without damaging the walls, you need to take your time and very carefully pry the boards off the wall. This means getting a crow bar (we tend to use a flat head screwdriver to start with!) into the top of the board and very gently wiggling it to loosen the board from the wall. You want to work your way along the board doing this, in order to loosen each nail. If you go all in and try to remove the board from the first point you get your crow bar in, then you'll either bring half the plaster down with the board, or you'll snap the board in two - not ideal if you intend on reusing it! Old victorian skirting boards are attached to the wall with big old nails into wooden slats which are sandwiched between brickwork. As a top tip for removing old victorian skirting boards and attaching new ones - I recommend is leaving the wooden slats in the walls. These will actually be highly useful for re-attaching new boards. If you're unable to remove the nails without wrenching the wood out the wall, you can quite easily break the exposed part of nails off, leaving the rest of it in the wood. These kind of nails are very easy to break, just give it a gentle up and down wiggle with some pliers and they'll snap right off. 

To fit our new skirting, we're both gluing and nailing it into place. The glue will hold it in place, but the nails will ensure a nice tight fit against the wall - which especially can't be achieved with glue if you have any slight curvature in your walls. Old walls are very rarely perfectly straight, so nails are usually always a must - and if you've left the little wooden slats in the walls, you can use these to re-nail into.

We left little marks on the wall to show where the slats of wood are - so when it came to nailing the new piece of skirting we were able to correctly position these nails. If you've left the old nail in the wood and just snapped the top off, then do be sure to take measurements of its exact position so you wont be hitting the new nail onto it.
 

These MDF boards are already primed white, but I've given them a couple of coats of white eggshell over the top as well and then caulked any gap between the board and wall. And here it is, looking perfectly matched in the room against our old skirting boards. Obviously it's much crisper in its cut but as the old/new boards aren't side-by-side it's really not that noticeably different. Basically in blends in pretty well - just what I wanted! I'm sure you can tell which is old/new here - but you do have to actually really look to notice the difference from a distance. 

We also replaced all the skirting in the kitchen area, which was also mismatched (and massively rotten!) this time just using glue since we've re-plastered the wall and luckily it's quite straight anyway. 


Our tiles aren't perfectly level so there is a bit of a gap underneath the skirting - but it's really not noticeable due to the chair being in front of it. If you can't quite get a perfectly crisp join at the corners - I recommend adding some caulk here too. It'll give you that perfect crisp edge and once painted, you'd never know! 
We also added some new skirting to the chimney breast - which you may remember was covered in 70s brickwork originally, so sadly missing its skirting. This time we've scribed it around the hearth and painted it dark to match the wall. 

So I think these boards are a pretty amazing match and I've even bought some more lengths for the conservatory as well. I'm a huge fan of keeping the originals if you can - but if you need to replace any, then I definitely recommend checking out Skirting World for their massive variety of boards and of course, they can even do or bespoke designed ones too. I would absolutely always recommend MDF boards over pine too - I'm seriously never going back. In terms of costings, I was pretty surprised at how much they cost. I always thought MDF wasn't worth buying as it's vastly more expensive, but a full length of 3m board cost £13 in the size we needed, which I personally thought wasn't too bad. Smaller heights are much cheaper, but of course if you need a lot then that does very quickly add up - another reason why we like to keep the originals. But it's definitely well worth the money for its quality and if you're as picky as I am about matching old boards to new ones. I'd love to know your thoughts on keeping old rugged skirting boards and whether you've ever had to match new for old too? *I was gifted one length of skirting board in return for a blog post. However I loved it so much, I went back and ordered more with my own cash. Thank you for supporting the brands who support this blog! from http://www.kezzabeth.co.uk/2018/01/matching-period-skirting-boards-with.html
0 Comments
Leave a Reply. |

 RSS Feed
